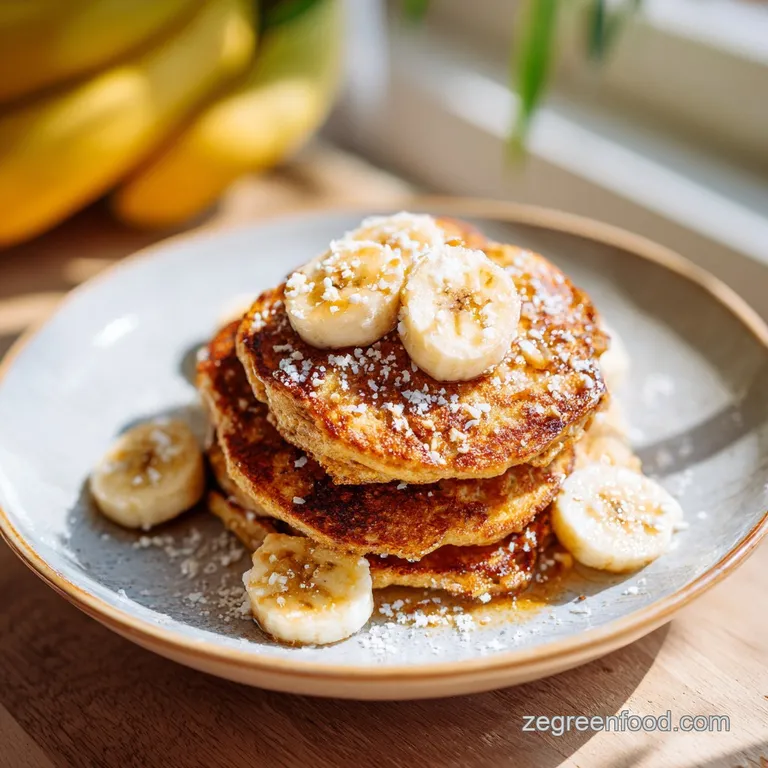
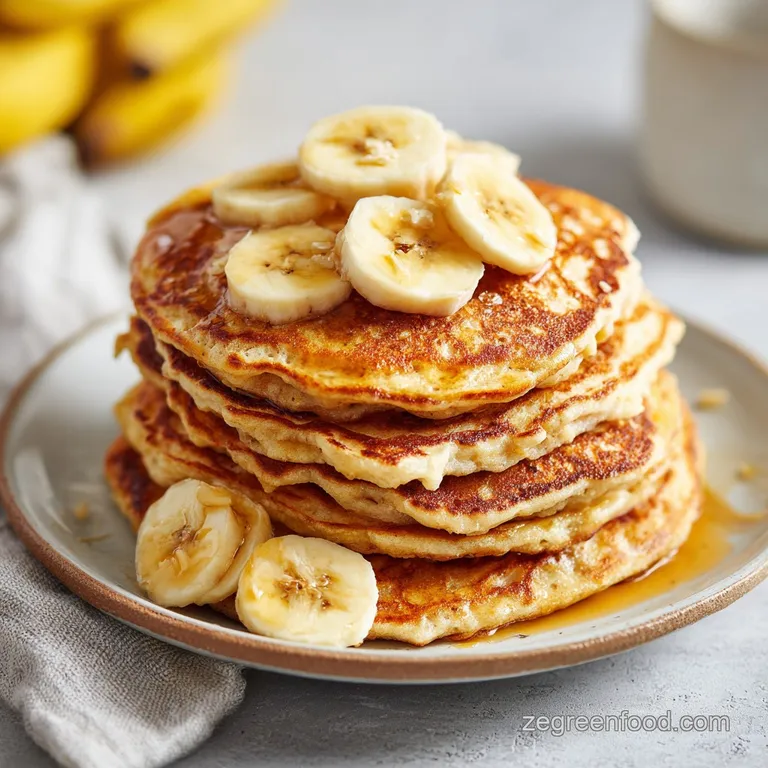
Fluffy Oatmeal Banana Pancakes for Baby
- Time: Active 5 minutes, Passive 6 minutes, Total 11 minutes
- Flavor/Texture Hook: Naturally sweet with a soft, velvety crumb and a hint of warm cinnamon.
- Perfect for: Baby led weaning, busy weekday mornings, and using up those brown bananas on the counter.
- Creating Soft and Golden Baby Banana Pancakes Every Time
- How to Actually Nail This Without Making a Mess
- Understanding the Texture and Timing for Little Eaters
- The Building Blocks of a Nutritious First Finger Food
- Essential Kitchen Tools for a Smooth Morning Routine
- Key Steps to Achieve the Perfect Matte Edge Sizzle
- What Can Go Wrong and How to Save Breakfast
- Make It Your Own with Safe Ingredient Variations
- Keeping It Fresh with Smart Storage and Freezing
- Presentation Tips to Make Mealtime Fun and Manageable
- Recipe FAQs
- 📝 Recipe Card
Creating Soft and Golden Baby Banana Pancakes Every Time
There is a very specific scent that fills the kitchen when a banana hits that "perfectly overripe" stage. It's almost floral, deeply sweet, and a little bit heady. I remember standing in my kitchen, staring at a bunch of bananas that looked like they’d seen better days, wondering if they were too far gone.
But that's the secret. The darker the peel, the better the result. When you mash that fruit down, it transforms into a syrupy, fragrant base that makes these baby banana pancakes smell like a warm hug before they even hit the pan.
The magic happens when that sweet mash meets the warm, nutty aroma of toasted oats and a pinch of cinnamon. When I first started making these for my little ones, I realized that the banana isn't just a flavor it's the structural hero.
It replaces the need for heavy oils or refined sugars, acting as both the sweetener and the binder. It's a humble ingredient that does all the heavy lifting, and honestly, no substitute like applesauce or pumpkin puree quite captures that specific caramel like scent that wafts through the house as they sizzle.
We've all been there, trying to flip a pancake that just falls apart into a soggy mess. I’ve had my fair share of "scrambled pancakes" because I was too impatient. But once you see those matte edges and smell the coconut oil starting to toast, you know you’ve nailed it. These aren't just for babies, either.
I often find myself snacking on the "test" pancake while standing over the stove because that combination of melted banana and cinnamon is just too good to pass up.
How to Actually Nail This Without Making a Mess
Making food for a tiny human can feel like a high stakes science experiment, but this recipe is intentionally low stress. The biggest trick I’ve learned is all about the "Oat Pulse." If you leave the oats whole, the texture is a bit too chunky and can be hard for new eaters to navigate.
By spending just 30 seconds turning those oats into a fine powder, you create a velvety batter that mimics a traditional pancake but with way more fiber. You'll hear the blender pitch change from a gritty rattle to a soft whir, and that’s when you know the flour is ready.
Another thing to keep in mind is the "Emulsion Phase." When you add the egg and banana to that oat flour, you aren't just mixing; you're creating a stable bond. You’ll see the batter turn a pale, creamy yellow. But the real secret is the rest.
Giving the batter just 2 minutes to sit allows the tiny particles of oat flour to soak up the moisture from the egg and banana. If you skip this, the batter might feel runny, and the pancakes won't have that satisfying "poof" when they hit the heat.
Finally, let's talk about the sizzle. You want the pan hot enough that the coconut oil shimmers, but not so hot that it smokes. When you drop that first tablespoon of batter, it should make a gentle whispering sound. If it's silent, the pan is too cold and the pancake will soak up the oil and get greasy.
If it pops and splatters, turn it down! It's all about finding that middle ground where the edges set into a beautiful golden ring while the center stays soft and manageable for little gums.
Understanding the Texture and Timing for Little Eaters
The timing for these is quite fast, but every second counts when you're dealing with fruit based batters. Because bananas have a high sugar content, they can go from golden to burnt in a heartbeat. I always tell my friends to look for the "Matte Finish." Traditional pancakes bubble all over, but these are denser.
You'll notice the very edge of the pancake stops looking wet and starts to look dull or matte. That is your green light to flip.
| Cook Method | Time | Texture | Best For |
|---|---|---|---|
| Non stick Skillet | 6 minutes | Crispy edges, soft center | Classic finger food texture |
| Griddle | 5 minutes | Even browning, very soft | Making large batches quickly |
| Cast Iron | 7 minutes | Deeply caramelized, firmer | Older toddlers who like a "crunch" |
When you flip them, the smell changes from raw batter to something resembling a toasted muffin. It’s that Maillard reaction the browning of the natural sugars that gives these pancakes their depth. I’ve found that using a thin silicone spatula is a lifesaver here.
It slides right under the delicate batter without tearing the "skin" that’s formed on the bottom. If you try to use a thick plastic turner, you might end up squishing the pancake, which ruins that lovely airy texture we’re going for.
The Building Blocks of a Nutritious First Finger Food
Every ingredient in this recipe serves a dual purpose. We aren't just tossing things in a bowl; we're building a balanced meal that actually stays together. The oats provide the "backbone," giving the pancake enough structure to be picked up and waved around without disintegrating.
I prefer Old Fashioned Rolled Oats because they have a heartier flavor than quick oats, and they stand up better to the moisture in the banana.
| Ingredient | Science Role | Pro Secret |
|---|---|---|
| Overripe Banana | Natural Binder & Sugar | The more black spots, the softer the crumb |
| Large Egg | Protein Structure | Whisk separately first for an even fluffier lift |
| Rolled Oats | Complex Carbohydrate | Pulse into flour to prevent a "gummy" interior |
| Ground Cinnamon | Aromatic & Digestion | Adds perceived sweetness without any actual sugar |
Coconut oil is my go to for the pan because it has a high smoke point and a subtle sweetness that complements the banana perfectly. You only need a tiny bit just enough to give the pan a glossy sheen.
If you find the pancakes are sticking, it's usually a sign that either the pan wasn't quite hot enough or the banana was so sugary that it's caramelizing a bit too fast. A quick wipe of the pan between batches usually solves this right away.
Essential Kitchen Tools for a Smooth Morning Routine
You don't need a professional kitchen to make these, but two tools make a massive difference: a high speed blender and a truly non stick pan. If your blender is a bit older, you might need to pulse the oats for an extra 15 seconds to get them really fine.
You're looking for something that feels like soft sand, not pebbles. This ensures the baby banana pancakes have a consistent texture throughout, which is safer for babies who are just learning to chew and swallow.
Chef's Tip: Freeze your overripe bananas without the peel in a freezer bag. When you're ready to make pancakes, thaw one in a bowl; the liquid that releases is pure banana nectar. Use it all in the batter for an even deeper flavor profile!
For the pan, I highly recommend a heavy bottomed non stick skillet. Thin pans tend to have "hot spots" that will burn the sugar in the banana before the egg has a chance to set. A heavier pan distributes the heat more evenly, which means every pancake in the batch comes out looking the same.
I also love using a small cookie scoop or a tablespoon to drop the batter. This keeps the pancakes uniform in size about 2 inches wide which is the perfect "palm grip" size for a baby led weaning journey.
Key Steps to Achieve the Perfect Matte Edge Sizzle
- Mill the oats. Place the 0.5 cup (45g) of dry oats into your blender. Pulse for 30 seconds. Note: This creates a homemade flour that is much fresher and more fibrous than store-bought versions.
- Combine the base. Add the 1 large overripe banana, 1 large egg, and 0.25 tsp cinnamon to the blender.
- Emulsify the batter. Blend on medium for 15 seconds. Look for a pale, velvety consistency with no large fruit chunks remaining.
- Hydration rest. Let the batter sit in the blender or a bowl for 2 minutes. Note: This is non negotiable; the oats need this time to absorb the liquid so the pancakes don't turn out soggy.
- Prep the heat. Set your skillet over medium low heat and add 1 tsp of coconut oil.
- Portion the batter. Drop small tablespoons of batter onto the shimmering oil. Keep them about 2 inches apart.
- The visual cue. Cook for about 2-3 minutes. Wait until the edges look matte and small bubbles form on the surface.
- The flip. Slide a thin spatula under and flip in one quick motion.
- Residual cook. Immediately turn off the heat. The pan is hot enough to finish the centers without over browning the outside.
- Steam finish. Let them sit in the warm pan for 1 minute. This ensures the egg is fully cooked while keeping the pancake soft and flexible.
What Can Go Wrong and How to Save Breakfast
The most common frustration people have is a "gummy" center. If your pancake looks beautiful on the outside but feels like wet paste on the inside, it’s usually because the heat was too high. The outside seared before the middle had a chance to set. Another culprit is using a banana that wasn't quite ripe enough.
A green or firm yellow banana has more starch and less sugar, which changes how the batter reacts to heat.
Why Your Pancakes Are Falling Apart
If the batter is too thin, the pancakes will spread out like crepes and become impossible to flip. This usually happens if the egg was extra large or the banana was massive. If this happens, don't panic.
You can whisk in an extra tablespoon of whole oats (or more oat flour if you have it) and let it sit for another 2 minutes. The oats will act like a sponge and pull that extra moisture back into the structure.
| Problem | Root Cause | Solution |
|---|---|---|
| Too Gummy | Heat too high or skipped the rest | Lower heat; let batter sit for 2 full minutes |
| Burning Quickly | High sugar in banana | Use medium low heat and a heavy bottomed pan |
| Sticking to Pan | Cold pan or not enough oil | Ensure oil shimmers before adding batter |
Common Mistakes Checklist
- ✓ Avoid using green bananas; they lack the necessary sticky sugars to bind the oats.
- ✓ Never skip the 2 minute rest period; the oats must hydrate to prevent a runny batter.
- ✓ Don't make the pancakes too large; 2 inch circles are much easier to flip and hold.
- ✓ Refrain from pressing down on the pancake with the spatula; it squeezes out the moisture.
- ✓ Ensure the pan is preheated for at least 3 minutes before the first drop of batter.
Make It Your Own with Safe Ingredient Variations
Once you’ve mastered the base recipe, it's fun to play around with different nutrients. For a bit of a "power boost," you can add a teaspoon of ground flaxseeds or chia seeds. They add a tiny bit of crunch and extra Omega-3s.
If you’re worried about allergies, you can swap the egg for a "flax egg" (1 tbsp ground flax + 3 tbsp water, sat for 10 minutes), though keep in mind the texture will be significantly denser and more like a moist cookie than a fluffy pancake.
If you’re looking for a different flavor profile, you might want to try adding a tiny bit of vanilla bean paste or even some finely grated zest from an orange. For older toddlers, a few wild blueberries pressed into the batter once it's in the pan creates little "flavor bombs" that burst when bitten. If you find yourself with an abundance of bananas and want something a bit more substantial for the adults in the house, you could even pivot and try making a Moist Eggless Banana Bread using similar pantry staples.
- Nutrient Boost: Add 1 tsp hemp hearts for a nutty flavor and extra protein.
- Veggie Twist: Fold in 2 tbsp of very finely grated zucchini (squeeze the water out first!).
- Berry Blend: Press 3-4 raspberries into the top of each pancake before flipping.
Keeping It Fresh with Smart Storage and Freezing
These pancakes are a meal prepper’s dream. Because they are moisture rich, they don't dry out as fast as traditional wheat pancakes. I usually make a double batch on Sunday and keep them in a glass container in the fridge. They stay soft for up to 3 days.
When it's time to serve, I just pop them in a dry skillet for 30 seconds on each side to take the chill off and bring back that toasted aroma.
For freezing, lay the cooled pancakes on a parchment lined baking sheet in a single layer. Once they are frozen solid (about 2 hours), toss them into a freezer bag. They’ll stay fresh for up to 2 months. You can grab two or three at a time and defrost them in the microwave for about 20 seconds. If you love the idea of grab and-go banana snacks, you should also check out these Banana Protein Balls, which use a similar flavor profile and freeze just as well.
Zero Waste Tip: If you have leftover batter that isn't quite enough for a full pancake, don't toss it! Smear it onto a piece of toast and bake it for 5 minutes. It creates a "banana bread toast" that is absolutely incredible with a cup of coffee.
Presentation Tips to Make Mealtime Fun and Manageable
For younger babies (6-9 months), I like to cut these pancakes into "fingers" long, thin strips about the width of two adult fingers. This allows the baby to grasp the strip in their fist and munch on the part sticking out.
As they develop their pincer grasp (usually around 9-10 months), you can move to small, bite sized squares. The texture is soft enough that they practically melt, but firm enough that the baby can practice their coordination.
You can also serve these with a "dipper" to make the meal more interactive. A little bit of full fat Greek yogurt or some unsalted almond butter thinned out with a bit of water or breastmilk/formula works beautifully.
The contrast between the warm, cinnamon scented pancake and the cool, tangy yogurt is usually a big hit. Just remember to keep the toppings simple and age appropriate to ensure a safe and happy breakfast experience for your little explorer.
- The Fan: Arrange strips in a semi circle with a dollop of yogurt in the middle.
- The Stack: For toddlers, make a "mini stack" with thin layers of nut butter in between.
- The Shapes: Use a small star or heart shaped cookie cutter for a special birthday breakfast surprise.

Recipe FAQs
Can my 7 month old eat banana pancakes?
Yes, they are suitable for a 7 month old. The texture is soft and easy for babies practicing self feeding to grasp and mash with their gums.
How to make banana pancakes for baby?
Pulse 0.5 cup of oats into a fine flour, then blend with one banana, one egg, and 0.25 teaspoon of cinnamon. Allow the batter to rest for 2 minutes to hydrate the oats, then cook 2 inch spoonfuls in a skillet lightly greased with coconut oil over medium low heat.
What are the three ingredients in baby pancakes?
The primary components are a large overripe banana, one large egg, and 0.5 cup of rolled oats. While cinnamon and coconut oil are included for flavor and cooking, these three make up the base structure.
What makes baby banana pancakes special?
They rely on the natural binding properties of overripe bananas and eggs to hold the oats together without added sugar or flour. If you enjoy mastering the emulsion of these simple ingredients, you can apply similar blending principles to our creamy avocado banana smoothie for a different nutrient dense texture.
Is it true I must use flour to get the right texture?
No, this is a common misconception. You do not need wheat flour because blending the oats into a fine powder creates a sufficient grain structure to bind the pancake.
How to prevent the pancakes from falling apart?
Wait for the edges to look matte and small bubbles to appear on the surface before you flip. Additionally, ensure you let the batter rest for 2 minutes, as this hydration step is crucial for the oats to thicken the mixture properly.
How to store leftovers?
Store in an airtight container in the refrigerator for up to 2 days. You can gently reheat them on the stovetop or serve them chilled, as they remain soft enough for infants to chew safely.
Healthy Baby Banana Pancakes

Ingredients:
Instructions:
Nutrition Facts:
| Calories | 36 calories |
|---|---|
| Protein | 1.3 g |
| Fat | 1.1 g |
| Carbs | 5.5 g |
| Fiber | 0.7 g |
| Sugar | 1.5 g |
| Sodium | 7 mg |
