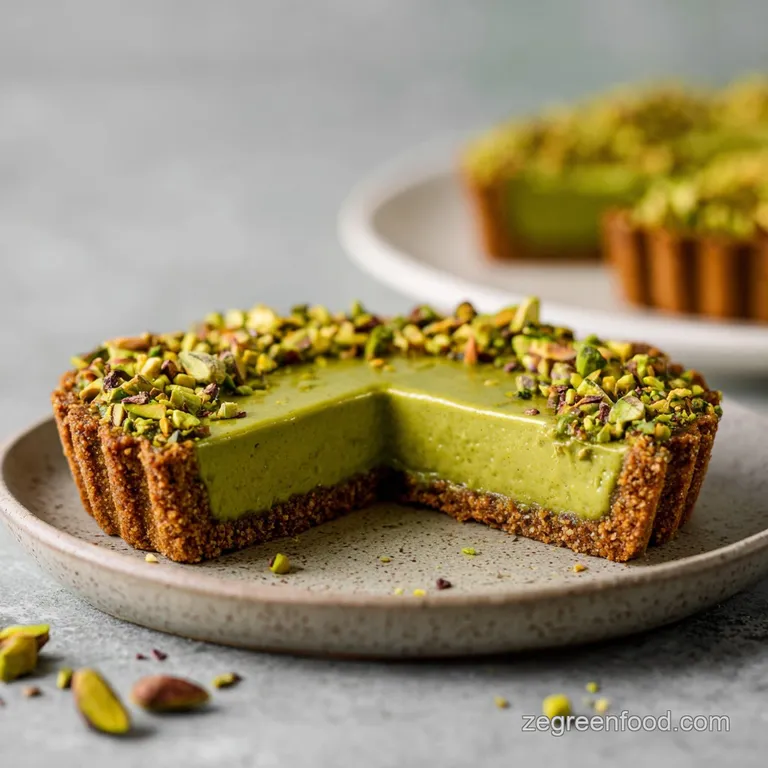
Pistachio Matcha Tart: Silky and Elegant
- Time: Active 15 minutes, Passive 30 minutes, Total 45 minutes
- Flavor/Texture Hook: Shatter crisp nutty crust with a velvety, earth sweet custard
- Perfect for: Spring dinner parties, tea time, or an impressive weekend project
- The Elegant Pistachio Matcha Tart Experience
- Physics of a Perfect Custard Set
- Component Analysis and Selection
- The Necessary Elements and Substitutes
- Essential Tools for Success
- Crafting the Perfect Green Tart
- Essential Troubleshooting and Fixes
- Adapting for Different Crowds
- Common Matcha Myths Debunked
- Smart Storage and Leftovers
- Flavor Pairings and Serving
- Recipe FAQs
- 📝 Recipe Card
The Elegant Pistachio Matcha Tart Experience
Matcha isn't just a trendy latte ingredient, it's a cultural cornerstone that dates back to the Tang Dynasty in China before becoming the heart of the Japanese tea ceremony, or Chanoyu. Traditionally, the tea is whisked into a frothy, bitter sweet brew designed to center the mind.
When we bring that history into a modern dessert like this Pistachio Matcha Tart, we're doing more than just baking, we're playing with a flavor profile that has been refined over centuries.
The first time I bit into a slice of this in a tiny bakery tucked away in the Gion district of Kyoto, the smell of toasted nuts hitting the grassiness of the tea felt like a revelation.
I used to think matcha was too "green" for a sweet tart, but the secret lies in the fat. In Japan, matcha is often served with a small, sugary wagashi candy to balance the palate. In our kitchen, the "wagashi" is the pistachio.
The natural oils in the nuts act as a bridge, softening the punch of the tea while adding a savory undertone that keeps the sugar from feeling cloying. It’s a sophisticated dance between two ingredients that really shouldn’t work as well together as they do.
Honestly, this recipe is about as close to edible art as we get on a Tuesday afternoon. We aren't just making a tart, we're creating a contrast of colors and textures that looks like a manicured moss garden. The smell in your kitchen when the pistachio crust hits the heat is something I wish I could bottle up.
It changes from the scent of raw flour to a deep, toasted aroma that lets you know the base is ready to hold that silky filling.
Physics of a Perfect Custard Set
Lipid Stabilization: The high fat content in the pistachio cream and heavy cream prevents the matcha particles from clumping, ensuring a smooth mouthfeel.
Protein Network: Using both whole eggs and an extra yolk creates a dense, velvety structure that holds its shape when sliced but melts instantly on the tongue.
Sugar Hydrophilia: Sugar attracts moisture, which keeps the custard from drying out or cracking while it undergoes the gentle 15-18 minute bake.
Starch Inhibition: Because we don't use cornstarch, the setting relies entirely on egg coagulation, resulting in a cleaner flavor release for the matcha.
| Preparation Level | Prep Time | Texture Result | Best Use Case |
|---|---|---|---|
| Fresh Ground Nuts | 15 minutes | Coarse, rustic, very crunchy | Casual family dessert |
| store-bought Flour | 5 minutes | Uniform, sandy, melts away | Professional presentation |
| Shortcut Crust | 8 minutes | Denser, more cookie like | Quick weeknight treat |
Making the choice between grinding your own pistachios or using a pre made nut flour really comes down to how much texture you want. If you grind them fresh, the irregular bits of nut provide a wonderful "shatter" when you bite in, whereas store-bought pistachio flour yields a more refined, professional looking crumb.
Regardless of the method, the interaction between the melted butter and the nut oils is what creates that signature shortbread snap. We are essentially frying the flour and nut particles in butter as they bake, which is why the aroma is so intense.
Component Analysis and Selection
| Ingredient | Science Role | Pro Secret |
|---|---|---|
| Pistachios | Provides structural fats and grit for a non soggy base. | Use raw, unsalted nuts to control the seasoning and color perfectly. |
| Matcha Powder | Adds tannins that cut through the richness of the heavy cream. | Sift twice; matcha is prone to static and forms stubborn lumps. |
| Egg Yolk | Acts as an emulsifier to bind the water and fat in the cream. | Ensure the yolk is room temperature to prevent the custard from breaking. |
The choice of matcha grade is actually the most important decision you'll make for this dish. While culinary grade is cheaper, it often has a muddy, brownish hue and a much more bitter finish. Ceremonial grade stays vibrant green even after baking, giving you that striking visual contrast against the pale gold crust.
The Necessary Elements and Substitutes
To make this Pistachio Matcha Tart, you'll need ingredients that provide both structure and high impact flavor. Here is exactly what I use in my kitchen to get that perfect balance every single time.
- 1 cup (125g) All purpose flour: The backbone of our shortbread. Why this? Provides enough gluten for structure without being tough.
- Substitute: 1:1 gluten-free baking blend works well here due to the high fat content.
- 0.5 cup (60g) Raw pistachios, finely ground: For that signature nutty flavor and green tint. Why this? Ground fresh, they retain oils that keep the crust moist.
- Substitute: Finely ground almonds (almond meal) if pistachios are unavailable.
- 0.33 cup (65g) Granulated sugar: Used in the crust for sweetness and browning. Why this? Helps the crust caramelize and crisp up in the oven.
- Substitute: Caster sugar for a finer, more delicate texture.
- 0.5 cup (113g) Unsalted butter, melted: The binder that makes the crust "clumpable." Why this? Melted butter ensures the flour is fully coated for a short crumb.
- Substitute: Vegan butter sticks (not tub margarine) for a dairy-free version.
- 0.25 tsp Sea salt: To sharpen all the other flavors. Why this? Salt is the secret to making the pistachio flavor pop.
- Substitute: Standard table salt, but use slightly less.
- 1 cup (240ml) Heavy cream: The base of our silky custard. Why this? High fat content (36%+) is non negotiable for the right set.
- Substitute: Full fat coconut milk (canned) for a tropical, dairy-free twist.
- 2 large Eggs + 1 large Egg yolk: The setting agents. Why this? The extra yolk adds a luxurious, custard like richness.
- Substitute: There isn't a great sub for eggs in this specific custard ratio.
- 0.5 cup (100g) Granulated sugar: Sweetens the filling. Why this? Dissolves quickly into the cream for a smooth finish.
- Substitute: Honey (use 1/3 cup) for a more floral, earthy sweetness.
- 1.5 tbsp (10g) Ceremonial grade matcha powder: Our star flavor. Why this? Best color and least bitterness for baking.
- Substitute: Culinary grade matcha, though the color will be darker.
- 2 tbsp (30g) Smooth pistachio cream: For flavor depth. Why this? Adds a concentrated "nutty" punch to the liquid custard.
- Substitute: Smooth almond butter or just omit for a pure matcha flavor.
- 1 tsp Vanilla bean paste: For aroma. Why this? The little black specks look beautiful against the green.
- Substitute: Pure vanilla extract.
- 2 tbsp Crushed roasted pistachios: For the final touch. Why this? Adds a needed crunch to the velvety filling.
Essential Tools for Success
You don't need a professional bakery setup, but having a few specific items makes the process much smoother. I personally love using a 9 inch tart pan with a removable bottom because it makes serving a breeze.
If you try to use a regular pie dish, you’ll lose that beautiful fluted edge and it’s much harder to get a clean slice.
A fine mesh sieve is also non negotiable. Matcha powder is notorious for forming tiny clumps that won't dissolve no matter how hard you whisk. Sifting it directly into the sugar or cream ensures you don't end up with a "bitter bomb" in the middle of your slice.
Chef's Tip: Use a heavy bottomed glass or a flat measuring cup to press your crust. This creates an even thickness across the bottom and forces the dough into the fluted sides, preventing the crust from slumped shoulders.
Crafting the Perfect Green Tart
Building the Nutty Base
- Preheat oven to 175°C (350°F). Ensure your rack is in the center position for even heat distribution.
- Combine dry crust ingredients. In a medium bowl, whisk together the flour, ground pistachios, sugar, and sea salt until the green flecks of nut are evenly distributed.
- Add the melted butter. Pour the 113g of melted butter into the bowl. Stir with a spatula until the mixture looks like wet sand and holds together when squeezed.
- Press into the pan. Transfer the dough to your 9 inch tart pan. Using a flat bottomed cup, press firmly into the bottom and up the sides. Note: Packing it tightly prevents the crust from crumbling when sliced.
- Blind bake the crust. Bake for 12–15 minutes until it smells nutty and looks pale gold. It should feel dry to the touch but not deeply browned.
- Cool and adjust heat. Remove the crust and immediately lower your oven temperature to 160°C (325°F). This lower heat is crucial for the delicate custard.
Emulsifying the Green Tea Filling
- Whisk the custard base. In a large bowl, combine the heavy cream, eggs, yolk, and sugar. Sift in the 10g of matcha powder.
- Incorporate the pistachio cream. Add the pistachio cream and vanilla bean paste. Whisk vigorously until perfectly smooth and emulsified. You shouldn't see any streaks of egg or lumps of green powder.
- Fill the warm crust. Pour the matcha mixture into the crust while it’s still warm. Note: This helps the custard start setting immediately at the edges.
- Bake the custard. Bake at 160°C (325°F) for 15-18 minutes until the edges are set but the center still has a slight jiggle. It should look like barely set gelatin.
- Cool and garnish. Let the tart sit at room temperature for 2 hours. This is where the magic happens and the texture becomes velvety. Sprinkle with the 2 tbsp of crushed pistachios before serving.
Essential Troubleshooting and Fixes
One of the most common issues people have with this recipe is a cracked surface. Usually, this happens because the oven was too hot or the tart stayed in too long. Custards are like sponges; if you squeeze them too hard (with heat), they'll push out all their moisture and shrink, causing cracks.
Another thing I've seen go wrong is the "soggy bottom." Because we aren't using a liquid heavy filling that needs hours of baking, this is less common here, but it can still happen if your crust isn't pressed firmly enough. The gaps in the crust allow the custard to seep through.
Why Your Custard Is Grainy
If your filling feels gritty on the tongue, it’s almost certainly the matcha. Matcha doesn't "dissolve" like sugar; it's made of microscopic leaf particles that stay in suspension. If they aren't sifted or if they clump together, they'll feel sandy.
| Problem | Root Cause | Solution |
|---|---|---|
| Cracked Filling | Oven temp too high or overbaked. | Remove when the center still "wobbles" like jelly. |
| Soggy Crust | Underbaked base or loose pressing. | Ensure the crust looks pale gold before adding filling. |
| Lumpy Matcha | Static in the powder or no sifting. | Always sift matcha through a fine mesh sieve into the bowl. |
Common Mistakes Checklist
- ✓ Sift the matcha powder twice to ensure no bitter lumps remain in the silky filling.
- ✓ Press the crust into the fluted edges using a spoon to ensure a strong structural wall.
- ✓ Lower the oven temperature promptly after the crust bake to avoid curdling the eggs.
- ✓ Allow the full 2 hour cooling time at room temperature; rushing this results in a runny center.
- ✓ Use a removable bottom pan to avoid breaking the delicate shortbread when de panning.
Adapting for Different Crowds
When I’m making this for a larger family gathering, I usually double the recipe and use a rectangular tart pan or two 9 inch pans. The beauty of this Pistachio Matcha Tart is that it scales quite linearly, though you have to be careful with the baking times.
Scaling Down (The Mini Version): If you want to make a small 6 inch tart, halve all ingredients. Use one whole egg and skip the extra yolk. Reduce the baking time for the crust to about 10 minutes and the filling to 12 minutes.
Scaling Up (The Party Version): For a double batch, I recommend keeping the spices and matcha at about 1.5x the original amount first, then tasting. Sometimes doubling the matcha can make the flavor too aggressive.
Use two separate pans rather than one giant one to ensure the center sets before the edges burn.
| Serving Size | Adjustments | Pan Type | Total Time |
|---|---|---|---|
| 2-4 People | Half recipe, use 1 egg | 6 inch round | 35 minutes |
| 10 People | Standard recipe (see Schema) | 9 inch fluted | 45 minutes |
| 20 People | Double recipe, 2 pans | Two 9 inch pans | 55 minutes |
Common Matcha Myths Debunked
One big misconception is that you need to whisk the matcha with hot water first. While that's great for tea, in a custard, adding extra water can mess with the setting point. Sifting it directly into the cream and sugar is much more effective for a concentrated flavor.
Another myth is that all matcha tastes the same once baked. This couldn't be further from the truth. Cheap matcha often takes on a fishy or hay like aroma when heated. Using a high-quality ceremonial powder ensures that the "umami" stays sweet and floral, which is exactly what we want in a luxury dessert.
Finally, people think you have to use a water bath (bain marie) for all custards. Because this tart is quite thin and the oven temperature is low (160°C), the crust actually acts as an insulator, protecting the filling from the direct heat and making a water bath unnecessary.
Smart Storage and Leftovers
This tart is best eaten the day it's made, but it will keep in the fridge for up to 3 days. Just be aware that the crust will slowly lose its "shatter" and become softer as it absorbs moisture from the custard.
- Fridge: Store in an airtight container. To prevent condensation from dripping onto the beautiful green surface, place a paper towel under the lid (but not touching the tart).
- Freezing: I don't recommend freezing this tart. The custard texture can become grainy and "weep" liquid when thawed, which ruins that velvety mouthfeel we worked so hard for.
- Zero Waste Tip: If you have leftover ground pistachios from the crust, don't throw them out! Toast them in a dry pan for 2 minutes and use them as a topping for your morning yogurt or oatmeal. If you have extra heavy cream, whisk it with a pinch of matcha and sugar for a quick green tea whipped cream to dollop on top.
Flavor Pairings and Serving
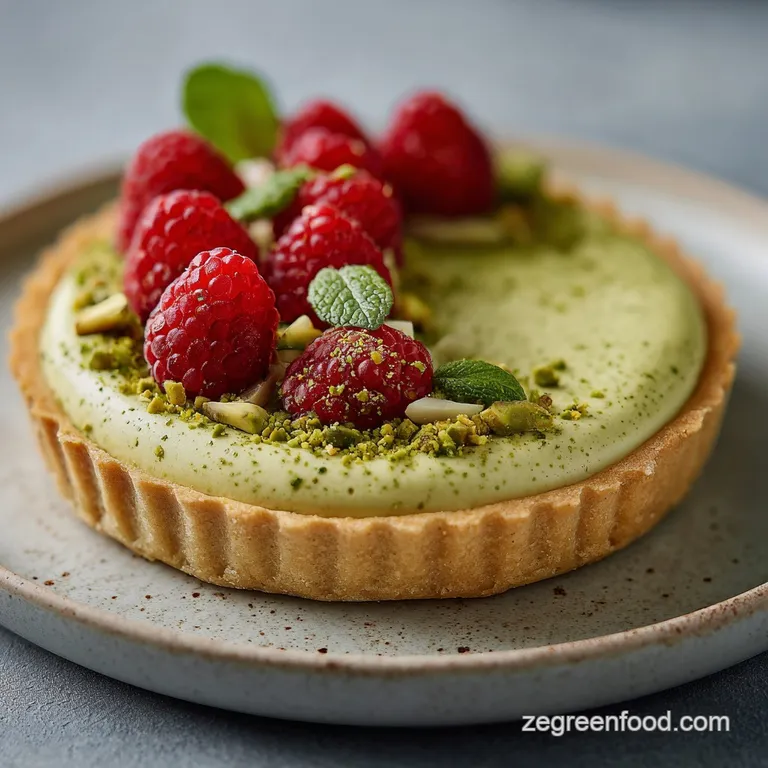
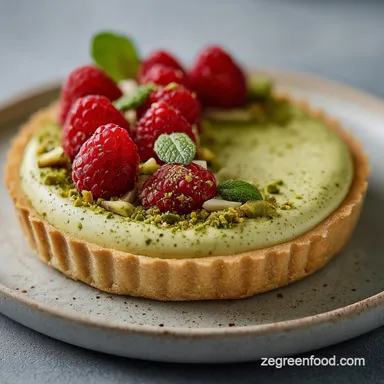
To really make this Pistachio Matcha Tart sing, I like to serve it with something that provides a bright acid contrast. A few fresh raspberries on the side or a tiny bit of lemon zest in a dollop of whipped cream works wonders.
The acidity cuts through the heavy lipids of the pistachio and cream, refreshing your palate between bites.
If you're serving this for an afternoon tea, a light bodied Oolong or a toasted rice tea (Genmaicha) is the perfect companion. The toasted notes of the rice in the tea mirror the toasted notes of the pistachio crust beautifully.
If you want X, do Y
- If you want a brighter color: Add a tiny drop of natural green food coloring to the custard before baking.
- If you want a deeper nut flavor: Toast the raw pistachios in the oven for 5 minutes before grinding them into flour.
- If you want a lighter texture: Replace the extra egg yolk with 2 tablespoons of Greek yogurt for a slight tang and fluffier set.
I've made the mistake of trying to slice this while it was still slightly warm don't do it! You'll end up with a green puddle. Patience is the most important ingredient here. Let it cool, let it set, and you'll be rewarded with a clean, sharp edge that looks like it came straight from a high end patisserie.
Enjoy every bite!

Recipe FAQs
Is it necessary to use a double boiler to heat the custard ingredients?
No, this is a common misconception. You can achieve a smooth custard by whisking the heavy cream, eggs, egg yolk, sugar, matcha, pistachio cream, and vanilla bean paste together in a single bowl at room temperature.
How to ensure the matcha powder dissolves perfectly in the filling?
Sift the matcha powder twice into the mixture before whisking. This extra step removes any stubborn clumps and ensures the final custard is perfectly silky and free of bitter pockets.
Is it okay to skip the temperature adjustment between baking the crust and the filling?
No, never skip the temperature drop. You must lower the oven from 350°F to 325°F after the crust is done to prevent the eggs in the custard from curdling, which ruins the texture.
How to get the crust evenly up the sides of the tart pan?
Use the flat bottom of a measuring cup to press the sandy dough firmly into the pan corners. Follow this by using a spoon to push the dough into the fluted edges to build a strong structural wall that won't crumble.
Can I slice the tart immediately after taking it out of the oven?
No, rushing the cooling process will result in a runny center. The tart requires at least 2 hours of cooling at room temperature to properly set the custard into a sliceable consistency.
Is it true I can use a standard cake tin instead of a removable bottom pan?
No, this is a common misconception. Using a pan with a removable bottom is essential for this recipe to ensure you can remove the delicate shortbread crust without it breaking.
How to tell when the tart is finished baking?
Look for set edges with a slight jiggle in the center. Pull the tart from the 325°F oven after 15 18 minutes, as the center will continue to firm up while it cools to room temperature.
Pistachio Matcha Tart
Ingredients:
Instructions:
Nutrition Facts:
| Calories | 357 kcal |
|---|---|
| Protein | 6 g |
| Fat | 25 g |
| Carbs | 31 g |
| Fiber | 2 g |
| Sugar | 17 g |
| Sodium | 65 mg |
