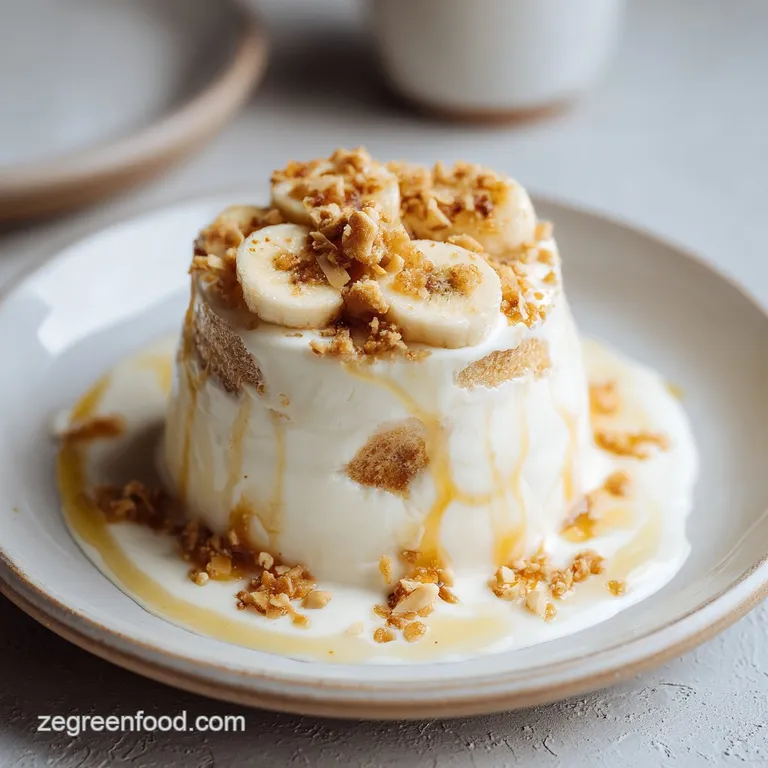
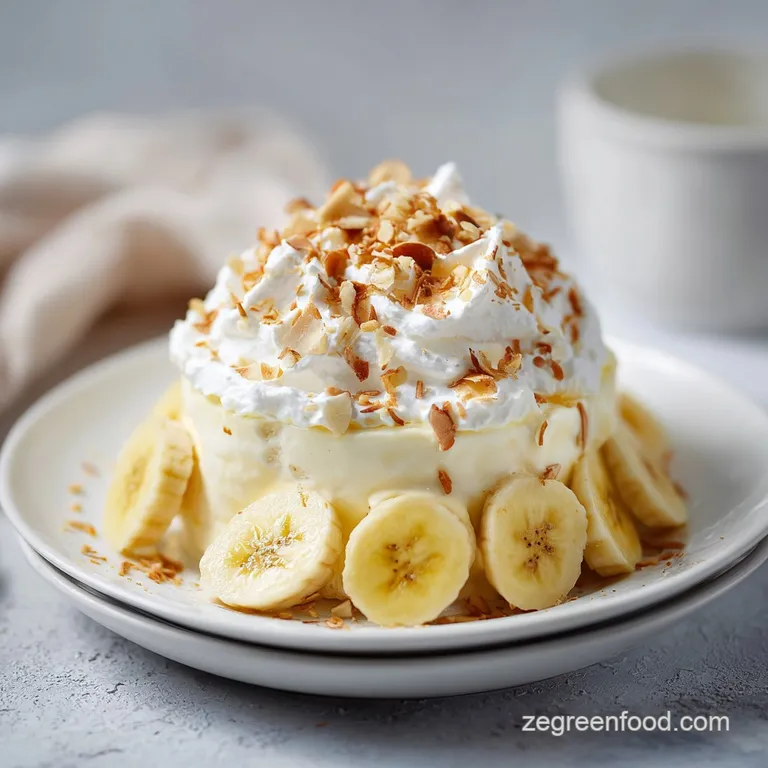
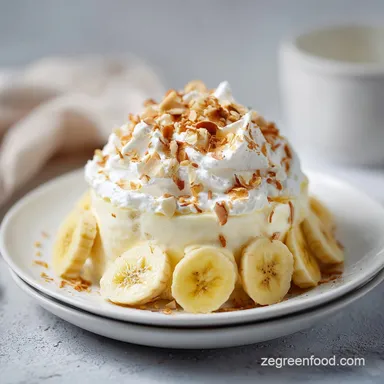
Vegan Banana Pudding: Silky and Creamy
- Time: Active 15 minutes, Passive 5 minutes, Total 20 minutes
- Flavor/Texture Hook: Silky vanilla custard with softened, cake like wafers
- Perfect for: Family gatherings and nostalgic comfort food cravings
- Why Most Vegan Banana Pudding Recipes Fail
- Essential Prep Times and Yield Specs
- The Best Vegan Banana Pudding Ingredients
- Tools for a Perfectly Smooth Custard
- Step by Step Assembly and Cooking
- Fixing Lumps and Improving Texture
- Gluten Free and Low Sugar Options
- Storage Tips and Zero Waste Ideas
- Perfect Pairings for This Dessert
- Adjusting Servings for Larger Crowds
- Debunking Common Plant Based Baking Myths
- Recipe FAQs
- 📝 Recipe Card
Why Most Vegan Banana Pudding Recipes Fail
Have you ever wondered why some plant based desserts leave a strange, chalky film on the roof of your mouth, while others feel like a velvet cloud? Most people assume that making a Vegan Banana Pudding is just a matter of swapping milk for a nut based alternative, but that’s exactly where the trouble starts.
If you don't handle the thickeners correctly, you end up with something that tastes more like a science experiment than a family heirloom. The secret isn't just in the ingredients; it's in how those ingredients interact under heat.
I remember my first attempt at this. I was so excited to make a dairy-free version for a potluck, but I rushed the stovetop process. The result? A pudding that tasted strongly of raw cornstarch and had the structural integrity of soup.
It was embarrassing, but it taught me the most important lesson in vegan custard making: patience is an ingredient. You have to give the starch time to hydrate and then cook through, otherwise, it ruins the delicate floral notes of the vanilla bean paste.
The magic of a truly great Vegan Banana Pudding lies in the layers. It’s not just about the custard; it’s about how that warm pudding interacts with the vanilla wafers. If the pudding is too cold when you assemble it, the cookies stay hard and crunchy.
If it’s boiling hot, the bananas turn into mush. We are looking for that "sweet spot" temperature where the wafers absorb just enough moisture to become cake like, creating a texture contrast that makes every spoonful interesting.
- Starch Activation
- Cooking the cornstarch for exactly 60 seconds after it bubbles ensures the raw, floury taste disappears completely.
- Fat Stability
- Using the solid cream from chilled coconut milk provides the saturated fat needed for the pudding to set firmly without eggs.
- Oxidation Control
- A tiny splash of lemon juice on the banana slices creates an acidic barrier that keeps them from turning grey and unappealing.
- Natural Pigment
- A whisper of turmeric mimics the golden hue of egg yolks without altering the classic vanilla flavor profile.
| Cook Method | Prep Time | Texture Result | Best For |
|---|---|---|---|
| Stovetop | 5 minutes | Silky, glossy, traditional custard | Classic pudding cups and layered bowls |
| Oven (Baked) | 25 minutes | Dense, set, almost like a bread pudding | Warm desserts or firm sliceable squares |
| No Cook (Instant) | 10 minutes | Light, airy, mousse like | Quick weeknight cravings or parfaits |
This stovetop method is the gold standard because it gives you total control over the emulsion. When you whisk the cashew milk and coconut cream together over a steady flame, you’re creating a stable fat in-water emulsion that feels rich on the tongue.
If you were to bake this, the high heat of the oven might cause the coconut fats to separate, leading to an oily finish that we definitely want to avoid.
Essential Prep Times and Yield Specs
When we talk about the logistics of this Vegan Banana Pudding, precision is your best friend. This isn't a "toss it in and hope" kind of dish. Because we are relying on plant based fats and starches to do the heavy lifting that eggs usually handle, the timing of each phase is critical.
You'll spend about 15 minutes slicing, whisking, and prepping your layers, followed by a very fast 5 minute window at the stove.
The yield for this recipe is 8 generous servings, which makes it perfect for a Sunday dinner or a small party. I’ve found that using a clear glass bowl or individual mason jars is the way to go here.
There’s something so satisfying about seeing those distinct layers of wafers, bananas, and golden custard through the side of the glass. It builds anticipation before the first bite is even taken.
| Component | Science Role | Pro Secret |
|---|---|---|
| Cornstarch | Primary Thickener | Whisk with sugar first to prevent "clump islands" in the pot. |
| Coconut Milk | Fat & Structure | Use only the solid white part for a thicker, richer mouthfeel. |
| Turmeric | Natural Colorant | Less is more; it only takes a pinch to get that egg yolk gold. |
| Vanilla Bean Paste | Flavor Depth | Add after heat to keep the volatile aromatics from evaporating. |
Adding the vanilla at the very end is a trick I learned from a pastry chef friend. Most people dump it in at the start, but the heat of the boiling pudding can actually dull the complex flavors of a high-quality paste.
By stirring it in once the pan is off the heat, you trap all those floral, woody notes inside the cooling starch matrix. It’s a small change that makes a massive difference in the final taste.
The Best Vegan Banana Pudding Ingredients
Let's talk about what's actually going into your bowl. Each of these ingredients was chosen to build a specific layer of flavor or texture. We aren't just looking for substitutes; we're looking for partners that work together to create a cohesive dessert.
For example, the combination of cashew milk and coconut milk provides a neutral but creamy base that allows the banana and vanilla to shine.
- 13.5 oz full fat coconut milk: This provides the "backbone" of the custard. Why this? High fat content mimics heavy cream for a luxurious, velvety finish.
- 0.5 cup unsweetened cashew milk: Why this? Its neutral flavor won't compete with the vanilla like almond milk might.
- 100 g organic cane sugar: Why this? Provides sweetness without the molasses undertones of brown sugar.
- 3 tbsp cornstarch: Why this? The essential thickening agent that creates the classic pudding "set."
- 1 tsp pure vanilla bean paste: Why this? The flecks of real vanilla bean make the pudding look and taste premium.
- 0.125 tsp turmeric: Why this? Purely for that nostalgic yellow color we expect in banana pudding.
- 1 pinch sea salt: Why this? Salt sharpens the sweetness and makes the banana flavor pop.
- 3 large ripe bananas: Why this? Look for "cheetah spots" they need to be sweet but not mushy.
- 7 oz vegan vanilla wafers: Why this? These provide the structural "cake" layers as they soften.
- 1 cup vegan whipped topping: Why this? Adds a light, airy contrast to the dense, rich custard.
- 1 tsp lemon juice: Why this? Prevents the bananas from browning through enzymatic inhibition.
| Original Ingredient | Substitute | Why It Works |
|---|---|---|
| Cashew Milk | Soy Milk | High protein content helps with a stable set. |
| Cane Sugar | Maple Syrup | Adds a caramel like depth. Note: Reduce cashew milk by 2 tbsp. |
| Cornstarch | Arrowroot Powder | Provides a shinier finish but can be slightly more "stringy." |
If you find yourself with extra bananas that are a bit too ripe for slicing, don't let them go to waste. You can actually use them in a Chocolate Peanut Butter Banana Bread for a completely different texture. But for this pudding, we need slices that hold their shape, so stick to bananas that are yellow with just a few brown freckles.
Tools for a Perfectly Smooth Custard
You don't need a professional kitchen to pull this off, but having the right heavy bottomed saucepan is a game changer. Thin pots tend to have "hot spots" that can scorch the sugar or cause the cornstarch to catch and burn before the rest of the liquid has thickened.
A heavy pot distributes the heat evenly, giving you a smooth, lump free result every time.
A silicone whisk is also essential. You’ll be doing a lot of whisking in those 5 minutes on the stove, and a silicone whisk allows you to get into the "corners" of the pan where the pudding likes to hide and thicken too quickly.
If you leave even a small amount of pudding un whisked at the bottom, it will form rubbery chunks that ruin the velvety vibe we're going for.
Finally,, make sure you have a sharp knife for those bananas. You want clean, even 1/4 inch rounds. If they are too thick, they won't integrate well with the wafers; too thin, and they’ll dissolve into the pudding. Precision in slicing leads to precision in the eating experience.
step-by-step Assembly and Cooking
- Combine the dry base. In your medium heavy bottomed saucepan, whisk together the 100g sugar, 3 tbsp cornstarch, sea salt, and 0.125 tsp turmeric while they are still dry. Note: This prevents the cornstarch from forming "clumps" when the liquid hits it.
- Incorporate the milks. Slowly pour in the 0.5 cup cashew milk and the solid cream from the top of the chilled 13.5 oz coconut milk can. Whisk vigorously until the mixture is a uniform, pale yellow liquid with no visible streaks of white cream.
- Thicken over heat. Place the pan over medium heat. Whisk constantly, making sure to scrape the bottom and sides of the pot.
- The 60 second rule. Once the mixture begins to bubble and thickens into a heavy custard, continue to cook and whisk for exactly 60 seconds. Note: This step is vital to cook out the starch flavor and ensure a stable set.
- Finish the flavor. Remove the pan from the heat immediately. Stir in the 1 tsp vanilla bean paste and set the pot aside to cool slightly while you prep the fruit.
- Prep the bananas. Slice the 3 large bananas into 1/4 inch rounds. Toss them lightly in the 1 tsp lemon juice in a small bowl. Observe that they stay bright and yellow rather than turning dull.
- Start the foundation. Begin layering in your chosen dish. Place a single layer of 7 oz vegan vanilla wafers at the bottom.
- Build the layers. Pour a layer of the warm pudding over the wafers, then add a layer of lemon tossed bananas. Continue until the dish is full, ensuring you finish with a layer of pudding.
- Seal the fruit. Make sure the final layer of pudding completely covers the top bananas. Note: This "seals" them from the air, preventing browning even without the lemon juice.
- Final chill. Top with 1 cup vegan whipped topping and a few extra crushed wafers. Let it sit in the fridge for at least 4 hours until the wafers have a cake like texture.
Chef's Tip: If you want a more "grown up" flavor profile, you can add a tiny splash of dark rum to the custard along with the vanilla. It adds a beautiful warmth that pairs perfectly with the sweetness of the bananas.
The way this pudding sets is very similar to how a Vegan Creme Brulee behaves before it’s torched. It relies on that perfect balance of fat and starch. As it chills, the coconut fat solidifies slightly, giving the pudding its "body," while the cornstarch provides the jiggly, spoonable texture that defines a classic pudding.
Fixing Lumps and Improving Texture
Even the best of us run into trouble sometimes. The most common issue with Vegan Banana Pudding is the texture of the custard. If your heat is too high, the cornstarch might activate unevenly, creating little "beads" of jelly in an otherwise liquid sauce. Don't panic!
Most of these issues are fixable if you catch them early enough.
Another thing to watch for is the "weeping" pudding. This happens when the sugar draws moisture out of the bananas over time, creating a watery layer at the bottom of your dish. While it doesn't affect the flavor, it can make the pudding look messy.
The lemon juice helps a bit here, but the real trick is making sure your custard is thick enough to "trap" that moisture.
Why Your Pudding Is Runny
If your pudding hasn't set after several hours in the fridge, it's usually because the cornstarch wasn't cooked long enough or the coconut milk didn't have enough fat. If you used a "light" coconut milk by mistake, the water content is simply too high for the starch to hold everything together.
| Problem | Root Cause | Solution |
|---|---|---|
| Grainy Texture | Cornstarch didn't dissolve | Whisk dry ingredients before adding liquid next time. |
| Watery Bottom | Bananas releasing moisture | Ensure the pudding is thick and "wraps" the bananas tightly. |
| Thin Custard | Didn't reach a full boil | Return to heat and whisk until large bubbles pop on the surface. |
When things go south, it’s usually a temperature issue. Remember that starch only thickens once it hits its "gelatinization" point, which is usually around 175°F (80°C).
If you stop whisking too early because your arm is tired, the starch never reaches that critical temperature, and you’ll be left with a milky soup instead of a rich pudding.
- ✓ Whisk the dry ingredients together first to break up any cornstarch clumps.
- ✓ Use full fat coconut milk from a can, not the carton from the refrigerated aisle.
- ✓ Don't skip the 60 second boil; it's what makes the pudding taste like vanilla, not flour.
- ✓ Let the pudding cool for 10 minutes before layering to avoid "melting" the bananas.
- ✓ Chill for at least 4 hours overnight is even better for the best wafer texture.
gluten-free and Low Sugar Options
If you’re looking to adapt this recipe for specific dietary needs, it’s surprisingly flexible. For a gluten-free version, the pudding itself is already safe, but you'll need to swap the vanilla wafers.
There are several brands that make gluten-free "vanilla cookies" that have a similar snap and will soften beautifully in the custard. Just check the labels to ensure they are also vegan!
For those watching their sugar intake, you can replace the cane sugar with a granulated monk fruit sweetener or stevia blend. However, keep in mind that sugar actually helps with the "set" of the pudding. If you remove it entirely, the texture might be slightly softer.
In that case, I'd suggest adding an extra half tablespoon of cornstarch to compensate for the lost solids.
For a Vegan Banana Pudding Pie
Want to turn this into a showstopper? Instead of layering it in a bowl, pour the entire mixture into a pre baked vegan graham cracker crust. Top it with the whipped cream and let it set firmly overnight. It slices beautifully and feels like a much fancier dessert than a simple pudding.
You could even drizzle a bit of vegan caramel over the top for an extra layer of decadence.
Storage Tips and Zero Waste Ideas
This Vegan Banana Pudding is at its absolute peak about 12 to 24 hours after assembly. This gives the wafers enough time to absorb moisture from the custard and turn into that iconic, soft, cake like texture.
If you eat it too soon, the cookies are too crunchy; if you wait longer than 3 days, they can start to get a bit too mushy.
- Fridge: Store in an airtight container for up to 3 days. Any longer and the bananas will begin to soften too much and release liquid.
- Freezer: I don't recommend freezing this dish as a whole. The coconut milk custard will likely separate and become grainy once thawed.
- Zero Waste: If you have leftover banana peels, don't toss them! You can actually "boil" clean organic peels to make a banana tea that's great for plants, or even use the inside of the peel to polish the leaves of your houseplants. For leftover wafers that have gone stale, crush them up and use them as a base for a pie crust or a topping for oatmeal.
If you find yourself with a small amount of leftover pudding that isn't enough for a full serving, try blending it into your morning smoothie. It adds a wonderful creaminess and a hit of vanilla that pairs perfectly with some spinach and a scoop of protein powder.
It’s a great way to make sure every drop of that liquid gold is put to good use.
Perfect Pairings for This Dessert
This pudding is quite rich, so it pairs best with things that offer a bit of contrast. A cup of strong, dark roast coffee or a bold Earl Grey tea is the perfect companion to cut through the sweetness of the bananas and the creaminess of the coconut.
The bitterness of the coffee balances the sugars in a way that makes you want to go back for a second scoop.
If you're serving this at a summer BBQ, it goes wonderfully alongside fresh berries. The tartness of a few raspberries or blackberries scattered on top adds a bright, acidic note that wakes up the palate.
You could even serve it in small shooters for a party, making it an easy "grab and go" dessert that doesn't require a spoon and a seat.
Adjusting Servings for Larger Crowds
Scaling this recipe up is quite simple, but you have to be careful with the thickeners. If you're doubling the recipe for a big family reunion, don't just double everything and walk away.
Large batches of pudding take longer to reach the boiling point, which means you’ll be whisking for a lot longer than 5 minutes.
When doubling, I recommend using a wider pot rather than a deeper one. This increases the surface area and helps the liquid heat more evenly. If the pot is too deep, the bottom can scorch while the top is still cold.
Also, remember that the "60 second boil" still applies, but you might need to be even more vigorous with your whisking to ensure the bottom doesn't catch.
- Half Batch: Use a small saucepan and reduce the boil time to 45 seconds. It will thicken very quickly!
- Double Batch: Increase the turmeric only slightly (don't quite double it) to keep the color natural. Use a large 4 quart pot.
- Baking Conversion: If you decide to turn this into a baked version, lower the oven temp to 160°C (325°F) and bake for 20 minutes until the edges are set but the center still has a slight jiggle.
Debunking Common Plant Based Baking Myths
One of the biggest myths in vegan cooking is that you need eggs for a "real" custard texture. This Vegan Banana Pudding proves that’s just not true.
Between the saturated fats in the coconut milk and the gelling power of the cornstarch, you can achieve a mouthfeel that is indistinguishable from a traditional egg based version. In fact, many people prefer the cleaner flavor profile of the vegan version because you don't have that "eggy" aftertaste.
Another common misconception is that you have to use "banana flavored" pudding mix to get a strong banana taste. Real bananas, especially those with plenty of brown spots, provide all the flavor you need. The pudding itself should be a beautiful vanilla backdrop that lets the fruit be the star of the show.
Using artificial flavorings often leads to a "candy like" taste that lacks the sophistication of the real deal.
Finally, some people think that you can't get a "golden" color without eggs. As we've shown with the turmeric, nature provides plenty of ways to get that classic look. The key is using such a small amount that it doesn't affect the flavor.
It’s all about the visual expectation; we eat with our eyes first, and that golden hue tells our brain that this is going to be a rich, satisfying experience.
Now that you've got the secrets to the perfect Vegan Banana Pudding, it's time to get whisking. Just remember: stay at the stove, watch for those bubbles, and give it the full 60 seconds. Your future self (and anyone lucky enough to share a bowl with you) will thank you for the effort.
It’s the kind of dessert that creates memories, one silky, vanilla flecked layer at a time.

Recipe FAQs
Is Jell-O Instant Pudding vegan?
No, most standard Jell-O brand pudding mixes contain dairy derivatives. Always check the ingredient label carefully, as many instant varieties are formulated with milk based solids or processed in facilities that handle dairy.
What can I use in place of milk for banana pudding?
Use a blend of full fat canned coconut milk and cashew milk. This combination provides the necessary fat content to achieve a rich, silky texture similar to the consistency required for our creamy vegan sauce base.
What is the best non-dairy milk for pudding?
Full fat coconut milk is the best choice for thickening. The high fat content in the cream top of the can acts as a stabilizer, ensuring the custard sets firmly once chilled.
Is there a vegan version of Jell-O?
Yes, there are several plant based pudding brands available. Look for mixes specifically labeled "vegan" or "dairy-free," which typically use cornstarch or tapioca starch as the primary thickening agent instead of animal based ingredients.
How to prevent cornstarch from clumping in the pudding?
Whisk the sugar, cornstarch, salt, and turmeric together while they are completely dry. Combining the dry ingredients thoroughly before adding any liquid ensures the starch particles are separated and prevents unwanted lumps in your final custard.
How to achieve the perfect cake like texture for the wafers?
Assemble the dish and let it rest in the refrigerator for 12 to 24 hours. This duration allows the vegan vanilla wafers to absorb just enough moisture from the pudding to soften perfectly without turning into a mushy consistency.
How to keep the bananas from turning brown?
Toss the banana rounds lightly in lemon juice immediately after slicing. This acid treatment creates a protective barrier that prevents oxidation, keeping the banana slices bright and fresh looking within the layers of the pudding.
Creamy Vegan Banana Pudding
Ingredients:
Instructions:
Nutrition Facts:
| Calories | 338 kcal |
|---|---|
| Protein | 2.6 g |
| Fat | 14.8 g |
| Carbs | 49.5 g |
| Fiber | 2.4 g |
| Sugar | 28.3 g |
| Sodium | 115 mg |
