Date Scones with Cream: Flaky and Tender

- Time: Active 10 minutes, Passive 15 minutes, Total 25 minutes
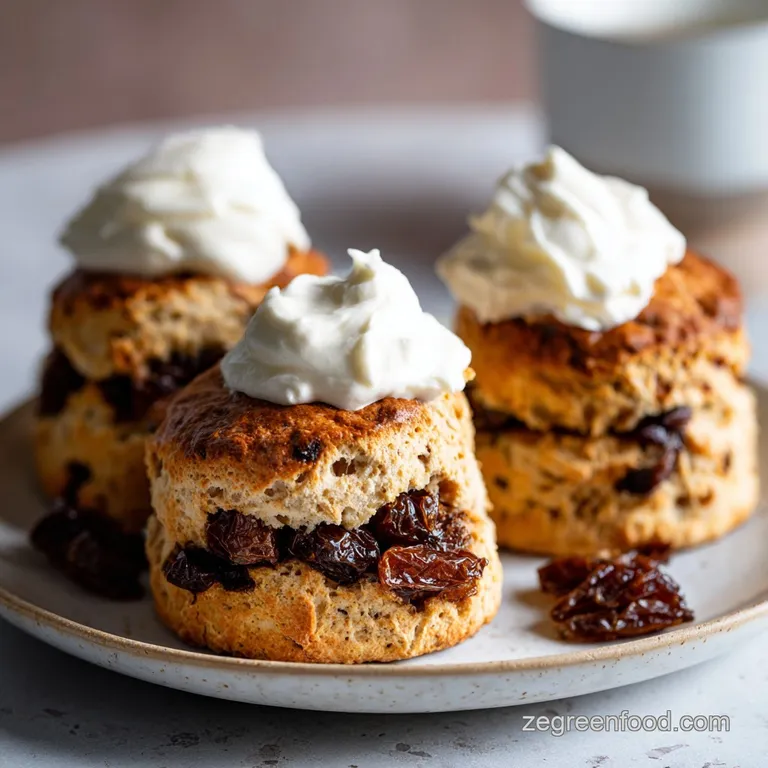
- Flavor/Texture Hook: Flaky, golden edges with a soft, pillowy center and sweet, caramel like date pockets.
- Perfect for: Last minute afternoon tea, busy weekend brunches, or beginner bakers.
- Mastering Truly Authentic Date Scones with Cream
- Why Cold Cream and Soft Dates Ensure Flaky Results
- Important Numbers for Getting Your Scones Just Right
- Selecting High Quality Flour and Medjool Dates
- Essential Kitchen Tools for Shaping and Baking
- A Step by Step Guide to Mixing and Baking
- Common Baking Mistakes and Professional Tricks
- Creative Flavor Swaps and Dietary Adjustments
- Debunking Myths About Mixing and Baking
- Storing and Reheating Your Baked Goods
- Beautiful Ways to Serve Your Scones
- Recipe FAQs
- 📝 Recipe Card
Imagine the smell of warm sugar and toasted grain wafting through your kitchen on a sleepy Sunday morning. There is something absolutely magical about the moment you pull a tray of these golden triangles out of the oven, their tops glistening and their edges crisp.
Discover the simple joy of our amazing 3 Ingredient Date Scone with Whipped Cream.
I remember the first time I tried this specific method; I was skeptical that just three ingredients could produce something so sophisticated. But when I saw that first scone shatter under a dollop of cool cream, I was hooked.
It’s all about the contrast between the craggy, rustic exterior and the velvety, fruit studded middle.
The secret isn't in a long list of fancy items but in how you treat the few things you have. We are looking for that specific sensory hit: the sound of the crust crackling, the sight of steam escaping as you break one open, and the sweet, chewy tug of a Medjool date.
It’s comfort food that feels like a warm hug, and honestly, you'll never go back to the complicated versions again.
Mastering Truly Authentic Date Scones with Cream
Getting a scone to rise into a tall, proud pastry instead of a flat, sad biscuit comes down to temperature and handling. When I first started baking, I used to manhandle the dough like I was kneading bread, which resulted in something closer to a hockey puck than a pastry.
The goal here is a "shaggy" dough one that just barely holds together. This keeps the gluten relaxed, ensuring every bite stays tender rather than tough.
The dates themselves provide a natural, concentrated sweetness that negates the need for added sugar in the dough itself. As they bake, the sugars in the dates slightly caramelize against the flour, creating these little pockets of "date jam" throughout the scone.
Using the heavy cream as the primary fat source is a total shortcut that actually yields a more consistent result than cold butter because the fat is already perfectly emulsified.
Why Cold Cream and Soft Dates Ensure Flaky Results
- Steam Expansion: The high water content in chilled heavy cream evaporates rapidly in a 400°F (200°C) oven, forcing the dough upward to create airy layers.
- Gluten Inhibition: High fat content from the 1.25 cups of cream coats the flour proteins, preventing them from forming long, chewy strands that would make the scones bread like.
- Natural Humectants: Medjool dates act as moisture traps, releasing hydration slowly into the surrounding crumb so the scones don't dry out.
- Chemical Leavening: The self rising flour contains a precise ratio of baking powder that reacts instantly with the moisture and heat for a reliable rise.
| Method | Time | Texture | Best For |
|---|---|---|---|
| Traditional (Butter) | 45 minutes | Very short, crumbly | Classic English High Tea |
| Cream Method | 25 minutes | Soft, pillowy, rich | Quick brunch or beginners |
| Cold Fermentation | 12 hours | Deep flavor, extra rise | Planning ahead for guests |
Since we are skipping the labor intensive process of cutting in butter, the quality of your cream becomes the star of the show. I always tell my friends to look for a heavy cream with the highest fat percentage available usually around 36% to 40%.
This fat is what carries the flavor and provides that luxurious mouthfeel we crave in a high end bakery scone.
Important Numbers for Getting Your Scones Just Right
Precision in baking isn't about being a scientist; it's about being a consistent artist. For this recipe, we are looking for a few key checkpoints. First, your dough disk should be exactly 1 inch thick.
If it’s too thin, the scones will dry out before they brown; too thick, and the middle will stay doughy while the outside burns. Second, ensure your oven is truly at 400°F (200°C) before the tray goes in. A cool oven is the enemy of a good rise.
| Component | Science Role | Pro Secret |
|---|---|---|
| Self Rising Flour | Structural base & leavening | Sift twice to incorporate air for a lighter "bakery style" dome |
| Heavy Cream | Fat, liquid, & browning | Keep it in the very back of the fridge until the second you need it |
| Medjool Dates | Sweetness & moisture | Toss in flour after chopping so they don't clump into one giant ball |
The relationship between the flour and the cream is a delicate balance of hydration. We want just enough liquid to hydrate the starch without over saturating it. If you find your dough is too sticky to handle, don't keep adding flour! Instead, chill the dough for 10 minutes.
Cold dough is much easier to shape than warm, sticky dough, and it will hold its shape better in the heat of the oven.
Selecting high-quality Flour and Medjool Dates
The ingredient list is short, so every item needs to pull its weight. Here is exactly what you need to gather for your 8 servings of Date Scones with Cream.
- 3 cups self rising flour (450g): This is your shortcut to success.
- Substitute: 3 cups all purpose flour + 4.5 tsp baking powder + 3/4 tsp salt.
- Why this? It ensures a perfectly even distribution of leavening agents for a consistent 2 inch rise.
- 1.25 cups heavy whipping cream (310ml), chilled: Use the full fat stuff.
- Substitute: Full fat coconut milk (though the flavor will change).
- Why this? The fat provides tenderness while the liquid creates steam for height.
- 1 cup Medjool dates (150g), pitted and chopped: Medjools are the "king of dates" for a reason.
- Substitute: Deglet Noor dates (but soak them in warm water for 10 minutes first).
- Why this? They have a soft, almost creamy texture that melts into the dough perfectly.
- 1 cup heavy whipping cream (250ml), chilled for topping: For that iconic finish.
- Substitute: Thick Greek yogurt for a tangier, lower fat alternative.
- 1 tablespoon powdered sugar: Just a hint of sweetness for the topping.
- 0.5 teaspoon vanilla paste:
- Substitute: 1 tsp vanilla extract.
- Why this? The little black flecks look stunning and provide a deeper aromatic profile.
When you're shopping, look for dates that are plump and slightly shiny. If they look dull and feel hard, they’ve likely dried out too much. You can still use them, but they won't have that "jammy" quality that makes this recipe so special.
Honestly, don't even bother with pre chopped dates in a bag; they are often coated in dextrose and lack the moisture we need here.
Essential Kitchen Tools for Shaping and Baking
You don't need a pantry full of gadgets, but a few specific tools will make your life much easier. I always use a bench scraper. It is the single most underrated tool in a baker's arsenal. It helps you mix the dough without using your hands (which are warm and melt the fat) and makes clean up a breeze.
A parchment lined baking sheet is also non negotiable. It prevents the bottoms of the scones from browning too quickly and ensures they don't stick. For the cream, a hand mixer or a stand mixer is great, but honestly, if you're looking for a mini workout, a large balloon whisk and a cold metal bowl will get you to stiff peaks in about 3 to 5 minutes.
Finally,, a round biscuit cutter is ideal for that clean, vertical rise. If you don't have one, a sharp knife to cut triangles works perfectly fine. The key is to avoid anything with a dull edge that might "pinch" the sides of the dough together, which effectively seals the edges and prevents the scone from expanding upward.
A step-by-step Guide to Mixing and Baking
- Chop the Medjool dates into uniform 1/4 inch pieces. Note: If sticky, lightly toss them in a portion of the measured flour to prevent clumping.
- Place the 3 cups of sifted self rising flour in a large bowl and create a wide well in the center.
- Pour the 1.25 cups of chilled heavy cream and the chopped dates into the well.
- Use a bench scraper or knife in a cutting motion to integrate the ingredients until a shaggy dough forms. Note: Stop the moment there are no large pockets of dry flour; over mixing is the enemy here.
- Turn the dough onto a lightly floured surface and gently pat into a disk approximately 1 inch thick.
- Using a floured cutter, press straight down to cut out 8 scones. Do not twist the cutter as this seals the edges and stops the rise.
- Arrange on a parchment lined baking sheet and brush the tops with a small amount of extra cream.
- Bake at 400°F (200°C) for 12–15 minutes until the tops are golden brown and the bases sound hollow when tapped.
- Whisk the remaining 1 cup of cream with powdered sugar and vanilla paste until stiff peaks form and the whisk leaves a clear trail.
- Serve the scones warm with a generous dollop of the vanilla cream.
The "cutting motion" mentioned in step 4 is really important. Instead of stirring in a circle, which develops gluten, you want to use the edge of your tool to "chop" the cream into the flour. It feels a bit weird at first, but it ensures the lightest possible texture. If you're looking for more fruity baking inspiration, my vegan blueberry muffins use a similar "minimal touch" philosophy to get those bakery style domes.
Common Baking Mistakes and Professional Tricks
The most common heartbreak with scones is the "Slump." This happens when the dough is too warm or the oven isn't hot enough, and the scones tip over or spread out like cookies. To avoid this, I always pop my shaped scones into the freezer for 5 minutes right before they go into the oven.
This "cold shock" helps the fat stay solid for those first few crucial minutes of baking.
Another thing to watch for is the "Twist." When using a round cutter, it is so tempting to twist it to release the dough. Resist the urge! Twisting crimps the edges of the flour layers, essentially welding them together. If you press straight down and pull straight up, the layers are free to expand like an accordion.
Why Your Scones Are Heavy
This is usually caused by over working the dough. Every time you fold or press the dough, you are strengthening the gluten. Work with a "light touch" think of it as gently coaxing the ingredients together rather than forcing them.
Why Your Scones Are Dry
If your scones come out crumbly and dry, you might have measured your flour by packing it into the cup. Always use a spoon to fill your measuring cup and level it off with a knife, or better yet, use a kitchen scale to measure out exactly 450g.
| Problem | Root Cause | Solution |
|---|---|---|
| No Rise | Expired baking powder in flour | Test flour by adding a pinch to hot water; it should bubble |
| Dark Bottoms | Oven rack too low | Move rack to the center and use a double baking sheet |
| Sticky Dough | High humidity or too much cream | Chill dough for 15 mins before cutting to firm up the fat |
Common Mistakes Checklist
- ✓ Ensure the oven is fully preheated to 400°F (200°C) before the tray enters.
- ✓ Use chilled cream directly from the fridge; never let it sit on the counter.
- ✓ Pat the dough to 1 inch thickness don't guess, use a ruler if needed!
- ✓ Brush only the tops with cream, avoiding the sides to allow for an even rise.
- ✓ Let the scones rest for 2 minutes on the hot tray after baking to set the base.
Creative Flavor Swaps and Dietary Adjustments
While the 3 ingredient version is a classic for a reason, you can easily adapt this base to suit your mood. If you find yourself out of dates, dried figs or even dark chocolate chunks make a fantastic substitute. Just remember to keep the ratios the same.
If you are scaling the recipe down for a solo treat, it's pretty simple: half the flour and cream, and use a smaller bowl to keep the dough from drying out.
Adjusting the Batch Size
When doubling the recipe to 16 scones, I recommend working in two separate batches. Doubling a dough can lead to over mixing because it takes more effort to incorporate the larger volume of liquid.
If you do make a double batch at once, reduce the total liquid by about 10% initially and only add the rest if the dough is looking too dry.
| Original Ingredient | Substitute | Why It Works |
|---|---|---|
| Medjool Dates | Dried Apricots (chopped) | Similar chewiness but adds a tart, tangy profile |
| Heavy Cream (1.25 cups) | Buttermilk + 4 tbsp melted butter | Adds a classic tang. Note: Scones will be slightly more crumbly |
| Self Rising Flour | gluten-free Self Rising Blend | Works well, but usually requires 2 extra tbsp of cream |
If you want to try a different quick fix treat, my no bake date bark is another brilliant way to use up extra Medjool dates without even turning on the oven. It's a great contrast to the fluffy texture of these scones.
Debunking Myths About Mixing and Baking
One of the biggest myths in the baking world is that you need butter for a good scone. While butter provides a specific flavor, heavy cream is actually about 36% butterfat anyway. By using cream, you are essentially using "liquid butter" that is already perfectly dispersed.
This actually prevents the common issue of having large chunks of butter that melt and create holes in the scone.
Another misconception is that scones must be eaten within an hour of baking. While they are certainly best warm, the addition of dates acts as a natural preservative. The moisture in the fruit keeps the crumb from staling as quickly as a plain scone would.
You can easily revive a day old scone with a 15 second zap in the microwave or a few minutes in a toaster oven.
Finally, some people think you need to "rest" scone dough like you would cookie dough. In reality, the longer scone dough sits, the more the chemical leaveners react and lose their "oomph." You want to get that dough mixed, cut, and into the heat as quickly as possible to maximize the lift.
Storing and Reheating Your Baked Goods
Scones are notorious for having a short shelf life, but we have ways to fight that. If you have leftovers, store them in an airtight container at room temperature for up to 2 days. For longer storage, these freeze beautifully. Wrap individual scones in plastic wrap and place them in a freezer bag.
They’ll stay fresh for up to 3 months. To reheat, just pop a frozen scone into a 350°F (180°C) oven for 10 minutes.
Zero Waste Tip: If you have dates that are a bit too hard, don't toss them! Simmer them with a splash of water and a cinnamon stick to make a quick date syrup. You can drizzle this over your finished scones or even use it in a creamy vegan potato soup to add a subtle depth of sweetness to the savory base. Also, if you find yourself with leftover whipped cream, dollop it onto parchment paper and freeze into "cream clouds" for your next cup of hot cocoa.
Beautiful Ways to Serve Your Scones
Presentation is where you can really let your personality shine. For a rustic look, I like to serve these on a wooden board with the whipped cream in a small stoneware bowl. Sprinkle a tiny bit of extra powdered sugar over the warm scones right before serving it looks like a light dusting of snow and adds a professional touch.
If you’re hosting a brunch, try "Scone gate" by offering both the whipped cream and a tart jam, like raspberry or apricot. It creates a beautiful color contrast and lets your guests decide if they are "cream first" or "jam first" people.
The dark, rich color of the dates inside the scone looks stunning when split open, especially when topped with that snowy white, vanilla flecked cream.
Ultimately, the best way to enjoy these is with a hot cup of tea or coffee and good company. There’s no need to be formal; these are meant to be broken apart with your hands, revealing that soft, steamy center.
Whether you're making them for a celebration or just a quiet Tuesday morning, they are guaranteed to make your kitchen feel like the best bakery in town.

Recipe FAQs
How do you make easy 3 ingredient scones?
Combine 3 cups self rising flour, 1.25 cups chilled heavy cream, and 1 cup chopped Medjool dates. Use a cutting motion with a bench scraper to integrate the ingredients until a shaggy dough forms, then pat into a 1 inch thick disk and cut out 8 scones.
What is the 15 minute rule for scones?
Bake your scones for 12 15 minutes at 400°F (200°C). Following this strict timing is crucial to ensure the tops turn golden brown while the bases achieve that essential hollow sound when tapped.
Do you soak dates before making scones?
No, soaking is unnecessary and can make the dates too mushy for the dough. Instead, chop them into 1/4 inch pieces and lightly toss them in a small portion of your measured flour to prevent clumping during mixing.
What is the secret ingredient in scones?
The secret is using strictly chilled heavy cream and minimal handling. If you enjoyed the precise emulsification method we use to create textures in other recipes, you will find that keeping your cream cold and not overworking the dough results in a superior, light crumb.
Is it true you must twist the cutter when shaping scones?
False, this is a common misconception that ruins the rise. Press the floured cutter straight down through the dough without twisting to ensure the sides remain clean and the scone rises evenly in the oven.
How to store leftover date scones?
Keep them in an airtight container at room temperature for up to 2 days. For longer storage, wrap each scone individually in plastic wrap and place them in a freezer bag for up to 3 months.
How to reheat frozen scones?
Place the frozen scone into a 350°F (180°C) oven for 10 minutes. This gentle heat restores the texture of the scone without drying out the dates inside.
Easy 3 Ingredient Date Scones
Ingredients:
Instructions:
Nutrition Facts:
| Calories | 497 kcal |
|---|---|
| Protein | 6.8 g |
| Fat | 25.9 g |
| Carbs | 57.6 g |
| Fiber | 2.7 g |
| Sugar | 13.8 g |
| Sodium | 619 mg |
