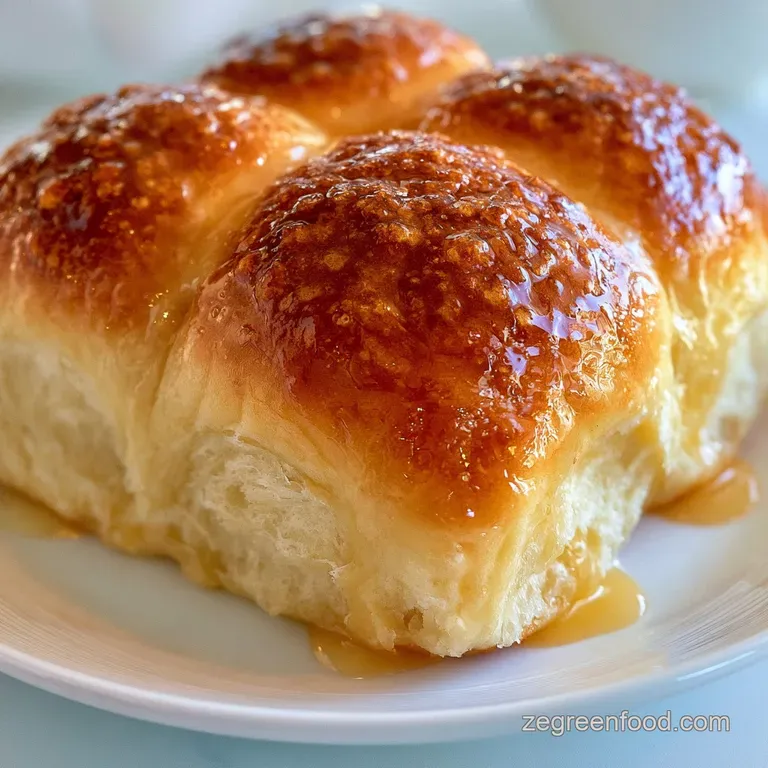
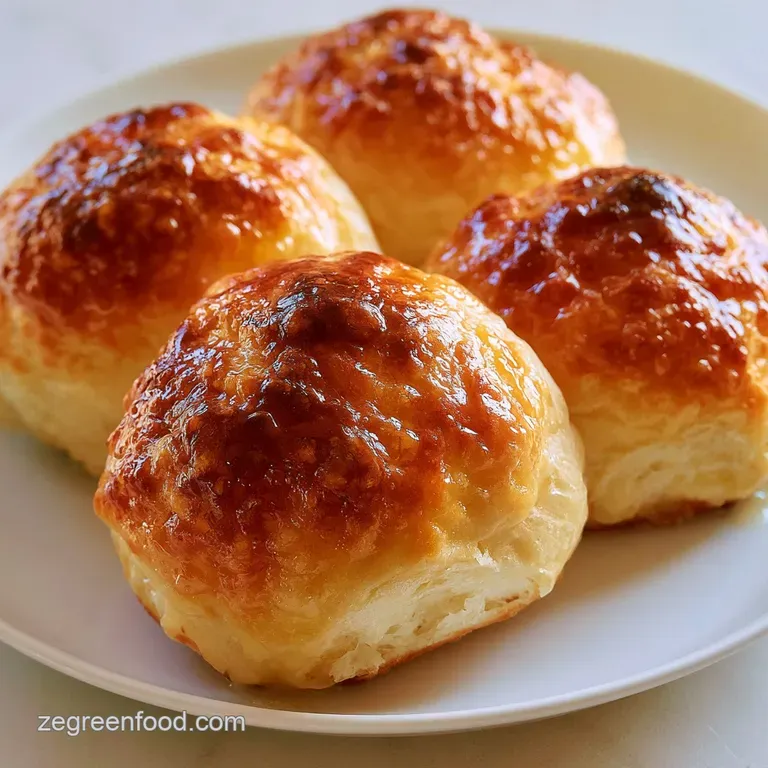
Soft and Fluffy Dinner Rolls: Pillowy and Golden
- Time: 10 min active + 2 hours 20 mins rising/resting = Total 2 hours 30 mins
- Flavor/Texture Hook: Pillowy soft with a glossy, golden brown crust
- Perfect for: Holiday dinners, Sunday roasts, or beginner bakers
- Best Soft and Fluffy Dinner Rolls
- The Secret to the Squish
- Component Analysis
- Essential Ingredients List
- Must Have Kitchen Tools
- Step by Step Guide
- Fixing Common Dough Issues
- Troubleshooting Common Issues
- Tasty Flavor Variations
- Adjusting the Batch Size
- Busted Bread Myths
- Keeping Your Rolls Fresh
- The Best Serving Ideas
- Recipe FAQs
- 📝 Recipe Card
The smell of warm, melting butter and yeasty dough hitting the oven air is, hands down, my favorite scent in the world. It’s that cozy, "everyone gather around the table" kind of aroma that makes a house feel like a home. I remember the first time I tried to make these for a family Thanksgiving.
I was so nervous about the yeast not waking up that I practically hovered over the bowl, staring at the milk until it bubbled.
But here is the thing: the real hero isn't the yeast, it's the butter. Most people treat butter as a side note, but when you use high-quality unsalted butter and incorporate it correctly, it changes everything. It turns a standard bread into something velvety and luxurious.
These soft and fluffy dinner rolls aren't just a side dish, they're the part of the meal everyone fights over.
You can expect a dough that's tacky but manageable, and a finished roll that practically bounces back when you press it. We're aiming for a contrast between that thin, golden brown exterior and a center that feels like a cloud. Trust me, once you move away from the store-bought cans, you'll never go back.
Best Soft and Fluffy Dinner Rolls
Right then, let's talk about why these work. Most homemade rolls end up too dense or dry because they lack the right fat to flour ratio. By using milk instead of water and a generous amount of softened butter, we're creating a "rich dough." This means the gluten strands are coated in fat, which prevents them from getting too tough.
When you're making soft and fluffy dinner rolls, the goal is to keep the crumb tight but light. The sugar doesn't just add a hint of sweetness, it feeds the yeast, giving you a more reliable rise. And that egg wash? That's what gives you the professional, glossy look without needing a commercial oven.
But what about the sogginess? Some people over proof their dough, and the rolls collapse. We'll avoid that by watching for the "pillowy" cue rather than just staring at the clock. Let's crack on with the details.
The Secret to the Squish
I'm not a scientist, but I've spent enough time in the kitchen to see how this stuff behaves. Here is what's actually happening in your bowl:
- Fat Coating: Butter wraps around the gluten proteins, which stops them from forming a tough network. This is why it feels velvety instead of chewy.
- Sugar Fuel: The granulated sugar gives the yeast an immediate energy boost, leading to a faster and more consistent rise.
- Milk Hydration: Milk proteins and sugars brown better than water, giving you that deep gold color.
- Egg Structure: The egg in the dough provides a bit of lift and a richer flavor, while the wash on top creates a seal for moisture.
| Method | Time | Texture | Best For |
|---|---|---|---|
| Oven | 20 mins | Golden crust, airy inside | Classic dinner parties |
| Stovetop (Pot) | 25 mins | Steamed, ultra pale, soft | Quick, rustic buns |
Component Analysis
Before we dive into the list, let's look at what these ingredients actually do. I've found that swapping these out often changes the "bounce" of the roll.
| Ingredient | Science Role | Pro Secret |
|---|---|---|
| All Purpose Flour | Provides structure | Measure by weight (375g) for consistency |
| Active Dry Yeast | Creates air pockets | Ensure milk is warm, not hot, to avoid killing it |
| Unsalted Butter | Tenderizes the crumb | Use softened, not melted, for better integration |
| Warm Milk | Adds richness/color | Room temp eggs prevent the butter from seizing |
Essential Ingredients List
You don't need anything fancy here, just a few pantry staples. Make sure your egg is at room temperature so it doesn't chill the dough.
- 3 cups (375g) all purpose flour Why this? Balanced protein for a soft but stable rise
- 1 cup (240ml) warm milk Why this? Creates a richer, softer crumb than water
- 2 ¼ tsp (7g) active dry yeast Why this? Reliable lift and classic bread aroma
- ¼ cup (50g) granulated sugar Why this? Feeds yeast and adds a subtle sweetness
- ½ cup (113g) unsalted butter, softened Why this? Essential for that velvety texture
- 1 tsp (6g) salt Why this? Controls yeast growth and enhances flavor
- 1 large egg, room temperature Why this? Adds structure and richness
- 1 large egg, beaten (for wash)
- 1 tbsp (15ml) water (for wash)
- 2 tbsp (28g) melted butter (for finishing)
| Original Ingredient | Substitute | Why It Works |
|---|---|---|
| All Purpose Flour | Bread Flour | More protein. Note: Result is slightly chewier, less "pillowy" |
| Warm Milk | Soy Milk (Unsweetened) | Similar fat content. Note: Works well for dairy-free versions |
| Unsalted Butter | Coconut Oil (Solid) | High fat content. Note: Adds a slight coconut aroma |
| Granulated Sugar | Honey | Natural sweetener. Note: Makes the rolls slightly denser and browner |
Honestly, don't even bother with low-fat milk or margarine here. You want the fat. That's where the magic happens. According to King Arthur Baking, the type of fat used in enriched doughs significantly impacts the shelf life and tenderness of the final product.
Must Have Kitchen Tools
You can do this all by hand, but a stand mixer such as KitchenAid makes the kneading process a breeze. If you're doing it by hand, just be prepared for a little arm workout.
- 9x13 inch baking pan
- Large mixing bowl
- Rubber spatula
- Measuring cups and spoons (or a digital scale)
- Pastry brush for the egg wash
- Damp kitchen towel for covering the dough
Step by step Guide
Let's get these soft and fluffy dinner rolls moving. Follow these steps and watch for the sensory cues.
Phase 1: Mixing and Kneading
- Combine warm milk, sugar, and yeast in a bowl. Let it sit for 5-10 minutes until it looks foamy on top. Note: If it doesn't foam, your yeast is dead start over!
- Gradually stir in the softened butter, egg, salt, and flour. Mix until a shaggy, messy dough forms.
- Knead the dough by hand or with a mixer for 5-7 minutes until it's smooth, tacky, and bounces back when you poke it with a finger.
Phase 2: The First Rise
- Place the dough in a lightly greased bowl. Cover it with a damp cloth and let it rest in a warm, draft free spot for about 1 hour until it has doubled in size.
- Gently punch the dough down to release the air. This prevents the rolls from having giant, awkward holes inside.
Phase 3: Shaping and Final Proof
- Divide the dough into 12 equal portions. Roll each piece between your palms until you have a tight, smooth ball.
- Place the rolls in your prepared 9x13 inch pan. Let them rise for another 30-45 minutes until they are pillowy and just touching each other.
Phase 4: Baking to Perfection
- Preheat your oven to 350°F (175°C). Brush the tops of the rolls with the beaten egg and water mixture for a glossy finish.
- Bake for 18-22 minutes until the tops are a deep golden brown.
- Immediately brush the hot rolls with melted butter while they're still sizzling from the oven.
Chef's Tip: To get a really professional look, use a bench scraper to divide the dough into 12 equal pieces. If you're eyeing it, some rolls will be huge and others tiny.
Fixing Common Dough Issues
Bread can be finicky, but most problems have a simple fix. If your dough feels off, don't panic.
Troubleshooting Common Issues
| Issue | Solution |
|---|---|
| Why Your Dough is Too Sticky | If the dough is sticking to everything, you might have too much moisture or your flour wasn't packed correctly. Don't just dump more flour in, or you'll end up with bricks. Add one tablespoon of flour |
| Why the Rolls Didn't Rise | This usually comes down to temperature. If your kitchen is cold, the yeast takes forever. Try putting your dough in the oven (turned OFF) with the oven light on for a bit of warmth. |
| Why the Bottoms are Burnt | If the tops look pale but the bottoms are charred, your pan might be too thin or you're baking on the lowest rack. Move the pan to the center rack for the next batch. |
Quick Success Checklist:
- ✓ Milk is warm (105-115°F), not boiling.
- ✓ Dough was kneaded until it passed the "poke test."
- ✓ Rolls were allowed to double in size during the second rise.
- ✓ Oven was fully preheated before the rolls went in.
Tasty Flavor Variations
Once you've mastered the base, you can really play around with this easy dinner roll recipe.
For Garlic Herb Flavor
Melt 3 tbsp of butter and mix in 1 tsp of garlic powder and 1 tbsp of chopped fresh parsley. Brush this over the rolls immediately after they come out of the oven instead of plain butter.
For a Sweet Honey Glaze
Whisk together 2 tbsp of melted butter and 1 tbsp of honey. This creates a beautiful, tacky sweetness that pairs great with savory meats.
For a dairy-free Swap
Use the soy milk and coconut oil substitutes mentioned in the table. For the egg wash, a bit of maple syrup mixed with water actually gives a surprisingly similar golden color.
If you're serving these with a meal, they go incredibly well with something creamy. I often pair these with my Cauliflower Alfredo Sauce over pasta for a comforting family dinner. The buttery rolls are perfect for soaking up any leftover sauce on the plate.
Adjusting the Batch Size
Sometimes you need 24 rolls, and sometimes you only need 6. Here is how to handle the math without ruining the texture.
Scaling Down (Half Batch): Use a smaller 8x8 or 9x9 inch pan. Reduce the bake time by about 20%, but still watch for that golden brown color. Since you can't easily split one egg, beat the egg in a cup first and then use half of the liquid for the dough.
Scaling Up (Double Batch): Do not double the salt or spices exactly increase them to about 1.5x to avoid an overpowering taste. Work in batches if your mixer is small; overloading the bowl can lead to uneven kneading.
For baking, lower the oven temp to 325°F (160°C) and extend the bake time by 5-10 minutes to ensure the center of the larger mass cooks through.
Busted Bread Myths
There are a lot of "rules" about bread that just aren't true. Let's clear a few things up.
Myth: You must "kill" the yeast with boiling water to make it work. Actually, boiling water will kill your yeast instantly. You want it warm, like a baby's bath. If it's too hot to touch, it's too hot for the yeast.
Myth: Adding more flour always makes the dough easier to handle. More flour equals a denser roll. If the dough is sticky, give it more time to knead. The gluten will develop and the dough will naturally become smoother without needing extra flour.
Keeping Your Rolls Fresh
These soft and fluffy dinner rolls are best eaten warm, but they keep well if you do it right.
Storage: Store leftovers in an airtight container or a zip top bag. They'll stay soft at room temperature for about 2 days. In the fridge, they last 5 days, but they tend to firm up.
Reheating: To bring back that "just baked" feel, wrap a roll in foil and pop it in a 350°F (175°C) oven for 5 minutes. Alternatively, a quick 10 second zap in the microwave works, but the foil method is better for the crust.
Freezing: You can freeze baked rolls for up to 3 months. Just flash freeze them on a tray first so they don't stick together, then toss them in a freezer bag.
Zero Waste: If you have a bit of leftover dough that didn't make it into a roll, don't toss it! Flatten it into a small pizza crust or a few mini focaccias. You can also use any stale rolls to make the best homemade croutons by cubing them and tossing them with olive oil and salt.
The Best Serving Ideas
These rolls are the ultimate chameleon. They fit in anywhere. For a fancy vibe, serve them in a basket lined with a linen cloth to keep them warm.
If you want a contrast in textures for a party platter, serve these alongside something light and steamed. I love putting these on a spread with Steamed Pork Dumplings — the rich, buttery bread balances the savory, light dumplings perfectly.
For a simpler meal, just serve them with a big bowl of chili or a thick beef stew. The rolls act like sponges for the broth. Just remember to keep them covered while you're prepping the rest of the meal so they don't dry out.
Trust me, these soft and fluffy dinner rolls will be the first thing to disappear from the table.
Recipe FAQs
What makes dinner rolls light and fluffy?
The combination of fat and proper proofing. Butter, milk, and eggs soften the crumb, while allowing the dough to double in size twice ensures a light, airy texture.
How do I get my bread soft and fluffy?
Knead the dough until it is smooth and bounces back when poked. This develops the gluten structure needed to trap air bubbles during the rise.
What is the secret of soft buns?
Brushing them with melted butter immediately after baking. This traps moisture in the crust and gives them a professional, glossy finish.
How to make the softest bread rolls?
Let the rolls rise for 30-45 minutes until pillowy and touching. This second proof is critical for achieving a cloud like interior.
Can I use cold milk instead of warm milk?
No, use warm milk. Cold liquid can shock the yeast and significantly slow down or stop the fermentation process.
What do these rolls pair best with?
Pair them with a nutrient dense main. These rolls balance perfectly with the earthy flavors of a quinoa salad.
Is it true that I must knead the dough for an hour to get it soft?
No, this is a common misconception. Knead only until the dough is smooth and tacky; over working the dough can lead to a tougher texture.
Soft And Fluffy Dinner Rolls

