Gluten Free Pumpkin Muffins: Healthy and Velvety
- Time:10 minutes active + 10 minutes resting = Total 42 minutes
- Flavor/Texture Hook: Spiced, velvety interior with a slight coconut sugar crunch
- Perfect for: Easy meal prep or a comforting weekend breakfast
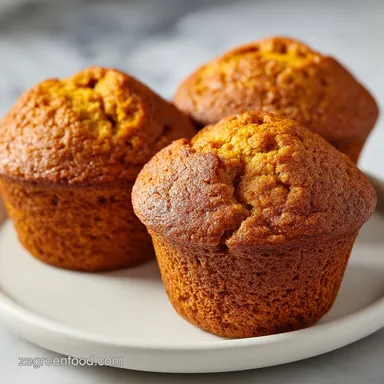
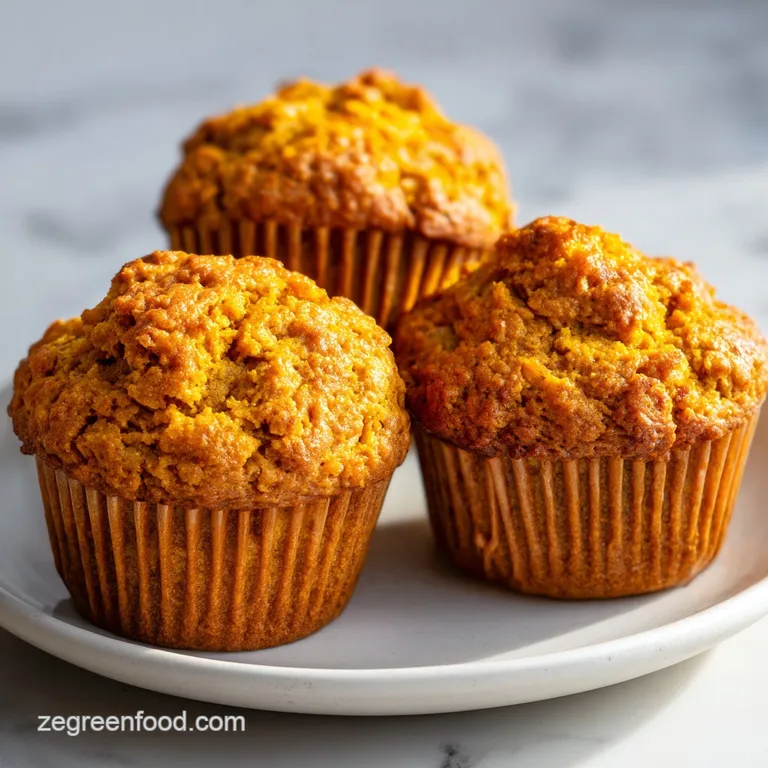
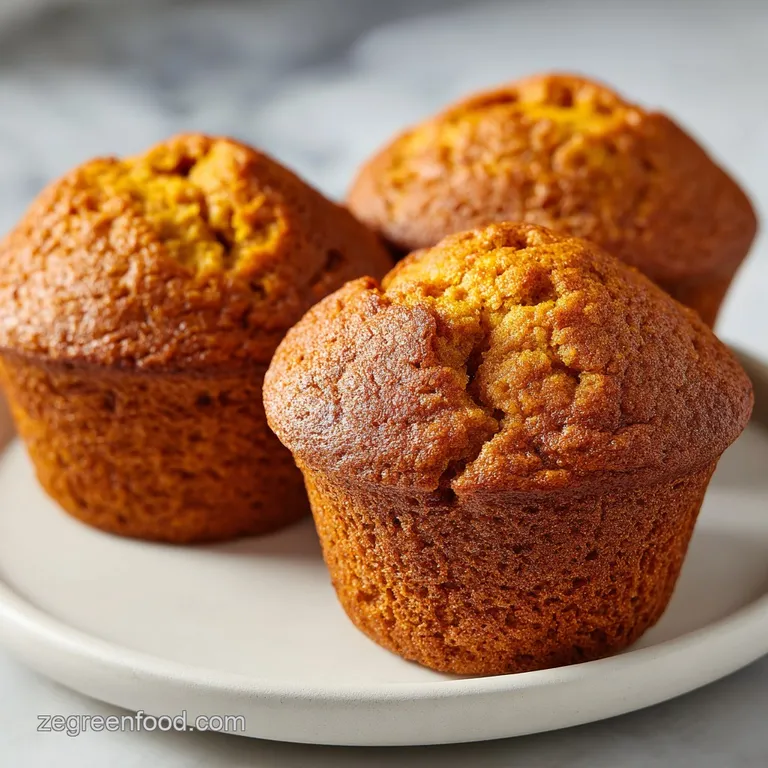
Pumpkin Muffins
That first scent hits you the second the oven door cracks open. It's not just pumpkin, it's that deep, woody aroma of toasted cinnamon and pungent ginger that suddenly makes the whole house feel like a sanctuary. I remember one rainy Tuesday last October when I was feeling totally drained.
I decided to whip these up, and the smell alone was enough to pull my kids out of their rooms and into the kitchen, practically vibrating with excitement.
We've all had those gluten-free bakes that feel like eating wet sand or, worse, a sponge that's too rubbery to chew. I spent a long time figuring out why my early attempts at Pumpkin Muffins were always a bit "off." It turns out, the secret isn't in the flour you buy, but in how you treat the batter before it hits the heat.
Once I stopped rushing the process, everything changed.
You can expect these Pumpkin Muffins to have a moist, dense interior that doesn't crumble the moment you touch it. They have a subtle sweetness from the maple syrup and coconut sugar, making them feel more like a treat than a health food, even though they're packed with nutrients.
Let's get into how you can make these exactly right the first time.
Why These Muffins Work
Since we're skipping the wheat, we have to be a bit smarter about how we handle the moisture. Here is what's actually happening inside your muffin tin.
- Starch Hydration: Letting the batter sit for 10 minutes allows the gluten-free flour to absorb the liquids, which gets rid of that gritty "sand" texture.
- Natural Humectants: Pumpkin puree and maple syrup hold onto water, ensuring your Pumpkin Muffins stay velvety for days rather than drying out.
- Leavening Balance: Using both baking soda and powder creates a two stage lift, giving you a rounded top instead of a flat pancake.
- Fat Emulsion: Coconut oil provides a stable fat structure that helps the crumb stay tender without needing dairy.
If you're interested in other ways to bake without traditional flours, my protein cookies recipe uses a similar approach to achieve a soft texture without the wheat.
Fresh vs. Canned Puree
| Feature | Canned Pumpkin Puree | Homemade Roasted Pumpkin | Impact on Result |
|---|---|---|---|
| Consistency | Uniform and smooth | Can be thicker or waterier | Canned is more predictable |
| Flavor | Mild, consistent | Intense, nutty | Homemade adds deeper character |
| Prep Time | Zero | 45-60 minutes | Canned is faster for weeknights |
The Essential Recipe Specs
Before we dive in, let's talk about the "why" behind the ingredients. When you're making Pumpkin Muffins, the ratio of wet to dry is everything. If you add too much puree, they'll be gummy; too little, and they'll be dry.
Component Analysis
| Ingredient | Science Role | Pro Secret |
|---|---|---|
| GF Flour Blend | Structural Base | Use a blend with xanthan gum already in it |
| Coconut Sugar | Flavor & Browning | Adds a caramel note that white sugar lacks |
| Pumpkin Puree | Moisture & Color | Pat it with a paper towel if it looks too watery |
| Maple Syrup | Tenderizer | Works with the oil to keep the crumb silky |
Everything You'll Need
For these Pumpkin Muffins, I recommend using high-quality spices. If your cinnamon has been sitting in the cupboard since 2019, toss it. Fresh spices make the difference between a bland muffin and one that smells like a professional bakery.
- 2 cups (280g) gluten-free all purpose flour blend Why this? Ensures a consistent rise and crumb
- 1/2 cup (60g) coconut sugar Why this? Deep, molasses like sweetness
- 1 tsp (5g) baking soda Why this? Reacts with maple syrup for lift
- 1/2 tsp (3g) baking powder Why this? Provides a secondary boost in the oven
- 1/2 tsp (3g) sea salt Why this? Balances the sweetness of the pumpkin
- 1 tbsp (6g) pumpkin pie spice Why this? The signature autumn flavor profile
- 1 tsp (2g) ground cinnamon Why this? Extra warmth for the scent
- 1/4 tsp (1g) ground ginger Why this? Adds a tiny bit of zing
- 1 cup (245g) pumpkin puree Why this? Natural moisture and vitamins
- 2 large eggs Why this? Binds the gluten-free grains together
- 1/3 cup (80ml) maple syrup Why this? Adds a velvety liquid sweetness
- 1/4 cup (60ml) melted coconut oil Why this? Plant based fat for a tender bite
- 1 tsp (5ml) vanilla extract Why this? Rounds out the spice notes
Ingredient Swaps
| Original Ingredient | Substitute | Why It Works |
|---|---|---|
| Coconut Sugar | Brown Sugar | Similar moisture; Note: Slightly less caramel flavor |
| Coconut Oil | Melted Butter | Richer taste; Note: Makes it non vegan/dairy included |
| Maple Syrup | Honey | Similar viscosity; Note: Stronger flavor, may overpower ginger |
| Pumpkin Puree | Butternut Squash | Very similar texture; Note: Slightly sweeter and milder |
Right then, before we move to the instructions, make sure your eggs are at room temperature. If you put cold eggs into melted coconut oil, the oil will seize up into little clumps, and you'll lose that smooth emulsion we're looking for in these Pumpkin Muffins.
Your Baking Toolkit
You don't need a fancy kitchen to make these, but a few basics make the process much smoother. I usually use a standard 12 cup muffin tin. If you have one of those non stick ones, great, but I still use paper liners. It makes cleanup a breeze and keeps the sides of the Pumpkin Muffins from getting too dark.
A rubber spatula is non negotiable here. You want to fold the ingredients, not beat them. If you overmix gluten-free batter, you can actually incorporate too much air, which leads to those dreaded "sinkholes" in the middle of your muffins.
Step-by-step Baking Process
Now, let's get these Pumpkin Muffins moving. Follow these steps closely, especially the resting period.
Phase 1: Prepping the Oven and Tin
Preheat your oven to 375°F (190°C). Line a 12 cup standard muffin tin with paper liners. Note: Getting the oven fully up to temp ensures the muffins spring up immediately.
Phase 2: Aerating the Dry Ingredients
In a large bowl, whisk together the gluten-free flour blend, coconut sugar, baking soda, baking powder, sea salt, pumpkin pie spice, cinnamon, and ginger. Whisk until no clumps remain. Note: This ensures the baking soda is evenly distributed so you don't get "salty" pockets.
Phase 3: Emulsifying the Wet Mix
In a separate bowl, whisk together the eggs, pumpkin puree, maple syrup, melted coconut oil, and vanilla extract. Stir until the mixture is a uniform emulsion. Listen for the whisk to sound smoother as the oil incorporates.
Phase 4: Folding and Resting
Gently fold the wet ingredients into the dry ingredients using a rubber spatula. Stir just until no streaks of flour remain. Stop the moment it looks combined. Now, let the batter rest for 10 minutes. This is where the magic happens for your Pumpkin Muffins.
Phase 5: The Bake
Divide the batter evenly among the 12 muffin cups. Bake for 20-22 minutes until the tops spring back when lightly touched and a toothpick comes out clean. You'll know they're done when the kitchen smells like a candle shop in October.
Chef's Tip: For a professional look, sprinkle a pinch of coarse coconut sugar on top of each muffin right before they go into the oven. It creates a tiny, shatter crisp crust that contrasts with the velvety inside.
Fixes and Common Mistakes
Even the best of us mess up a batch of Pumpkin Muffins. Usually, it comes down to the moisture levels or the oven temperature.
Troubleshooting Common Issues
| Issue | Solution |
|---|---|
| Why Your Muffins Sunk | If the center of your muffins collapsed, it's usually because the oven door was opened too early or there was too much leavening. Once the structure is set by the heat, it's stable. If you let the col |
| Why the Texture is Gummy | Gummy Pumpkin Muffins are almost always a sign of underbaking or too much puree. gluten-free flours take longer to "set" than wheat flours. Ensure you hit that 22 minute mark and let them cool in the |
| Why They Didn't Rise | This usually happens if your baking soda is expired or if you over mixed the batter, popping all the air bubbles. Check your leaveners by putting a pinch of baking soda in vinegar; if it doesn't fizz |
Success Checklist
- ✓ Flour blend contains xanthan gum
- ✓ Batter rested for exactly 10 minutes
- ✓ Eggs were room temperature
- ✓ Oven was fully preheated to 190°C
- ✓ Folded gently, not stirred aggressively
Fun Twists and Swaps
Once you've nailed the base recipe for Pumpkin Muffins, you can start playing with the flavors. I love adding a handful of dark chocolate chips to the batter for a more dessert like vibe. The bitterness of the chocolate cuts through the sweetness of the pumpkin beautifully.
If you want something more savory, omit the maple syrup and coconut sugar, and add a pinch of smoked paprika and some shredded cheddar. It transforms these into a savory breakfast treat that pairs brilliantly with a cup of coffee.
Customizing Your Batch
- For a Nutty Crunch: Add 1/2 cup of chopped pecans or walnuts.
- For Extra Moisture: Swap the coconut oil for applesauce, though the crumb will be slightly denser.
- For a Glaze: Mix powdered sugar, a splash of maple syrup, and a pinch of cinnamon. Drizzle over cooled muffins.
Making it Vegan
To make these gluten free pumpkin muffins vegan, replace the 2 eggs with "flax eggs" (2 tbsp ground flaxseed mixed with 6 tbsp water, let sit for 5 mins). The texture will be slightly heartier, but the flavor remains spot on.
Using Almond Flour
If you're looking for gluten free pumpkin muffins almond flour can be used, but don't swap 1:1. I recommend a mix of 50% almond flour and 50% GF blend. Pure almond flour can make the muffins too oily and prone to collapsing because it lacks the starch needed for a strong structure.
Keep Them Fresh
Pumpkin Muffins are naturally moist, but because they contain so much fruit puree, they can spoil faster than a standard vanilla muffin if left on the counter.
Storage Guidelines
Keep your muffins in an airtight container. On the counter, they'll stay fresh for about 2 days. In the fridge, they'll last up to 5 days. I actually prefer them slightly chilled; it makes the texture feel denser and more like a cake.
Freezing and Reheating
These freeze beautifully. Wrap each muffin individually in parchment paper and toss them in a freezer bag. They'll stay great for up to 3 months. To reheat, just pop one in the microwave for 20 seconds. It brings back that "just out of the oven" aroma instantly.
Zero Waste Tips
If you have leftover pumpkin puree in the can, don't toss it! You can freeze it in ice cube trays and drop them into a vegetable quinoa soup to thicken the broth and add a subtle earthy sweetness. Also, any "ugly" muffins that broke during peeling can be crumbled over yogurt or oatmeal for a pumpkin spice granola effect.
Serving and Enjoying
The best way to eat these Pumpkin Muffins is warm, with a thick slab of salted butter melting into the center. The salt cuts through the cinnamon and maple, creating a flavor balance that's hard to beat.
The Coffee House Pairing
If you're serving these for brunch, pair them with a strong dark roast coffee or a spicy chai latte. The tannins in the coffee balance the sweetness of the coconut sugar. For something lighter, a glass of cold almond milk is a classic choice.
The Autumn Breakfast Spread
I love putting together a full spread. Place the Pumpkin Muffins on a wooden platter with some sliced pears, a bowl of Greek yogurt, and a drizzle of honey. It feels fancy, but since the muffins are so easy to make, you can actually spend time with your guests instead of being stuck at the stove.
According to the USDA FoodData, pumpkin is rich in beta carotene and fiber, making these a much more satisfying breakfast than a sugary cereal. When you combine that nutrition with the comfort of warm spices, you've got a winner.
Final Pro Tips
If you're baking a double batch, remember to lower your oven temperature by about 10°C and extend the time by 5 minutes. This prevents the outside from burning before the center is cooked through.
Also, never stack your muffins while they're still warm, or you'll trap steam and make the tops soggy.
Right then, you're all set. These Pumpkin Muffins are about to become your new autumn obsession. Just remember: whisk the dry, emulsify the wet, fold gently, and for the love of all things tasty, let that batter rest!
Trust me on this, it's the difference between a "good" muffin and one that people will actually beg you for the recipe for. Happy baking!
Recipe FAQs
Can I skip the 10-minute batter rest?
No, the resting period is essential. It allows the gluten-free starches to fully hydrate, which prevents a gritty texture in the finished muffin.
Why are my pumpkin muffins gummy in the center?
They are likely underbaked. Ensure you bake them for the full 22 minutes and allow them to cool completely so the structure can set.
How to store these muffins to keep them fresh?
Place them in an airtight container. They will stay fresh on the counter for 2 days or in the fridge for up to 5 days.
Is it true that coconut sugar doesn't work in gluten-free recipes?
No, this is a common misconception. Coconut sugar provides a rich flavor and integrates perfectly with this gluten-free flour blend.
Why did my muffins sink in the middle after baking?
The oven door was likely opened too early. This causes a sudden temperature drop that collapses the muffins before the structure is stable.
How to ensure the muffins don't stick to the tin?
Line the 12-cup muffin tin with paper liners. This ensures a clean release and prevents the batter from clinging to the sides.
Do these muffins freeze well for meal prep?
Yes, they freeze beautifully. Just like our banana donut holes, you can store these in the freezer and reheat them for a quick breakfast.
gluten free Pumpkin Muffins