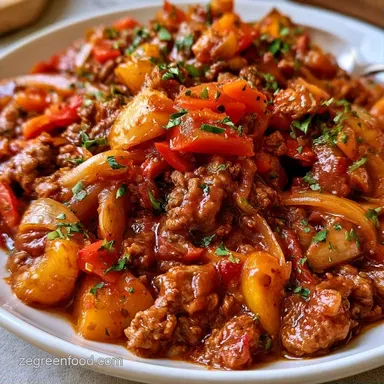
Ground Beef Pepper Skillet in 30 Minutes
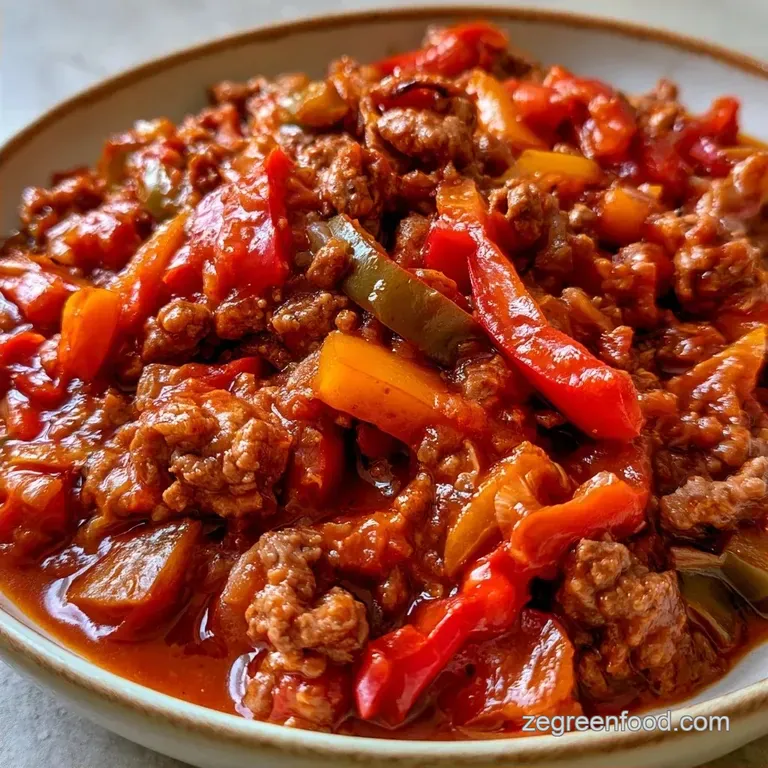
- Time: 10 minutes prep + 20 minutes cooking
- The Appeal: Savory beef paired with crisp peppers and gooey cheese
- Perfect for: Quick weeknight eats or family meal prep
- Ground Beef Pepper Skillet Guide
- How it Actually Works
- Simple Shopping List
- Ingredient Swaps
- Essential Pan Gear
- Cooking Process Steps
- How it Actually Works
- Fixing Common Issues
- Keeping and Reheating
- Scaling This Meal
- Debunking Common Myths
- Fun Flavor Twists
- Serving the Dish
- High in Sodium
- Recipe FAQs
- 📝 Recipe Card
That searing sound of beef hitting a hot pan is exactly what a successful Tuesday night sounds like to me. I used to believe traditional stuffed peppers were the only way to go, but I grew tired of packing rice into hollowed-out vegetables only to have them collapse in the oven.
Switching to a "deconstructed" approach changed everything. You get the exact same taste profile, but you aren't battling a vegetable "bowl" that refuses to stand upright. Every forkful delivers a perfect balance of sweet peppers and hearty beef.
This Ground Beef Pepper Skillet is my favorite solution when the clock is ticking but I still want a satisfying meal. It's filling, cozy, and uses a single pan, which means I can avoid a sink full of dishes later.
Ground Beef Pepper Skillet Guide
For those who love the taste of traditional stuffed peppers but hate the prep, this is the answer. The trick is in the order of operations. If you dump everything in at once, you get a soggy mess. If you sear the meat first and add the peppers later, you keep those bright, snappy textures.
The contrast here is what makes it work. You have the rich, savory beef paired with the slightly sweet, crisp tender bell peppers. Then the melted cheddar ties it all together with a creamy finish that balances the acidity of the tomatoes.
Whether you're feeding a crowd or just making extra for tomorrow's lunch, this dish is reliable. It's a family favorite that doesn't require any fancy skills, just a decent deep skillet and about 30 minutes.
How it Actually Works
Getting this right comes down to two simple things. It's not about fancy techniques, just a bit of heat management.
High Heat Searing: Browning the beef and onions creates deep, savory flavors that you just can't get from simmering. It builds a base of flavor that carries through the whole dish.
Tomato Deglazing: The liquid from the diced tomatoes lifts all those browned bits from the bottom of the pan. This incorporates all that concentrated beef flavor directly into the sauce.
| Method | Time | Texture | Best For |
|---|---|---|---|
| Stovetop | 30 mins | Integrated & Snappy | Weeknights |
| Oven | 60 mins | Layered & Soft | Sunday Dinner |
Simple Shopping List
Ensure your rice is already cooked before beginning. Cooking it in the pan with the meat increases the time required and often results in a gummy texture.
The Beef Base
- 1 lb lean ground beef Why this? Minimizes excess fat for a better flavor balance
- 1 medium yellow onion, finely chopped Why this? A fundamental aromatic starting point
- 3 cloves garlic, minced Why this? Contributes a pungent, savory depth
- 1 tbsp olive oil Why this? Promotes searing and prevents sticking
The Garden Mix
- 3 large bell peppers, cut into 1-inch pieces Why this? Mix colors for a better appearance and taste
- 1 can (14.5 oz) diced tomatoes, undrained Why this? Supplies the primary liquid and tang
- 1 can (8 oz) tomato sauce Why this? Thickens the mixture to coat the rice
The Hearty Fillers & Finishers
- 3 cups cooked white rice Why this? Absorbs the sauce without becoming mushy
- 1 tsp dried oregano Why this? For an earthy, herbal quality
- 1 tsp smoked paprika Why this? Lends a subtle wood-fired taste
- 1.5 cups shredded cheddar cheese Why this? A sharp profile that cuts through the tomato
- salt to taste
- black pepper to taste
What Each Ingredient Does
| Ingredient | Role | If You Don't Have It |
|---|---|---|
| Lean Ground Beef | Core protein and savory base | Ground turkey (Lighter, milder flavor) |
| Bell Peppers | Sweetness and texture | Frozen pepper mix (Softer consistency) |
| Cooked Rice | Volume and sauce absorption | Quinoa or cauliflower rice (Grainier) |
| Cheddar Cheese | Richness and binding | Monterey Jack (Milder, melts faster) |
Ingredient Swaps
If you're looking for a different twist on this Ground Beef Pepper Skillet, a few changes can shift the vibe. For a more traditional feel, you can use a mix of red, green, and yellow peppers.
For those avoiding dairy, you can skip the cheese and top the dish with fresh parsley and a squeeze of lime for brightness. If you want a bit more kick, adding a pinch of red pepper flakes with the garlic works wonders.
Essential Pan Gear
While you don't need fancy equipment, the right pan makes a difference. A 12-inch deep skillet is ideal, as a shallower pan will likely let tomatoes splash everywhere once they start bubbling.
I recommend a cast iron or stainless steel skillet for their excellent heat retention, which helps brown the beef more efficiently. A non-stick pan is an alternative, though you might sacrifice some of that deep sear on the meat.
A sturdy spatula is also essential. You'll be breaking apart the beef and mixing in the rice, so a tool that can effectively scrape the bottom of the pan is key.
Cooking Process Steps
Follow these steps to keep the textures spot on. The goal is for the beef to be brown and the peppers to have a slight snap.
1. The Searing Phase
Heat the olive oil over medium high heat in your 12 inch deep skillet. Add the ground beef and diced onion. Stir frequently to break the meat into crumbles. Cook for about 8 minutes until the beef is browned and no longer pink.
2. The Softening Phase
Stir in the chopped bell peppers and minced garlic. Sauté for 4–6 minutes. You want the peppers to brighten in color and soften slightly, but they should still maintain a bit of a crunch.
3. The Liquid Addition
Pour in the undrained diced tomatoes and the tomato sauce. Stir in the oregano and smoked paprika. Bring the mixture to a gentle bubble, then reduce the heat to medium low.
4. The Rice Integration
Fold in the cooked rice gently. Use a folding motion rather than stirring aggressively so you don't mash the grains. Simmer for 5 minutes until the liquid has thickened and coats the rice.
5. The Cheese Finish
Spread the shredded cheddar cheese evenly over the top. Cover the skillet with a lid for 1–2 minutes. Remove from heat once the cheese is completely melted and bubbly.
Chef's Note: If your beef releases a lot of grease during the first step, tilt the pan and spoon out the excess before adding the peppers. This keeps the final dish from feeling oily.
How it Actually Works
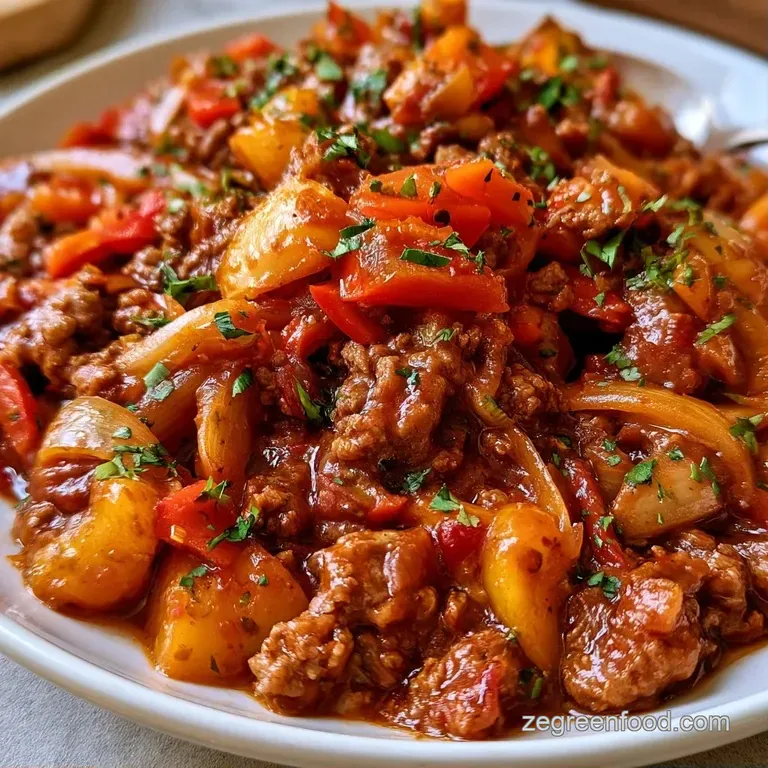
When making a Ground Beef Pepper Skillet, it's easy to overcook the vegetables. The key is adding the peppers after the beef has already browned. This ensures the beef gets that deep color while the peppers stay vibrant.
If you're looking for something similar, try this Skillet with Ground Beef recipe for more variety. The difference is mainly in the sauce ratios and the specific herb blend.
Fixing Common Issues
Even straightforward recipes can run into trouble. Here is how to resolve the most frequent glitches.
Fixing Rubbery Beef
If your beef is grey and rubbery, your pan likely lacked sufficient heat, causing the meat to steam rather than sear. In the future, ensure the oil is shimmering before adding the beef. If this has already happened, continue as usual, though the dish will lack some of that deep, seared flavor.
Stopping Mushy Rice
Rice often becomes mushy if it was overcooked initially or stirred too frequently. To correct this, simmer the mixture uncovered for an additional 2–3 minutes to allow the extra moisture to evaporate.
Removing Excess Grease
Don't worry if you notice a pool of oil on top of the sauce. Simply use a clean spoon or a wide paper towel to skim the grease off the surface before adding the cheese to ensure the dish feels lighter.
Keeping and Reheating
This Ground Beef Pepper Skillet stays delicious for several days. Keep any remaining portions in a sealed container in the refrigerator for up to 3 days.
Fridge Storage
Try to avoid using the microwave for reheating, as it can often leave the rice gummy and the cheese rubbery. Instead, warm a serving in a small pan over medium heat, adding a splash of beef broth or water to loosen the sauce.
Freezer Instructions
This meal lasts up to 2 months in the freezer. I suggest freezing it in single portions. For the best results, thaw your portion in the fridge overnight before reheating it on the stove.
The Best Reheating Way
If you prefer the microwave, cover the food with a damp paper towel. Heat in 1-minute bursts, stirring in between to keep the rice grains moist.
If you enjoy meal prepping, my Stir Fry Meal Prep recipe is another fantastic choice for your weekly menu.
| Ingredient | Budget Option | Impact | Savings |
|---|---|---|---|
| Lean Beef | Ground Turkey | Milder taste | Moderate |
| Cheddar | Monterey Jack | Melts faster | Low |
| Fresh Peppers | Frozen Mix | Softer texture | Moderate |
Scaling This Meal
Changing the portion size is simple, though choosing the correct pan is key.
Scaling Down (Half Portion) Use an 8 inch or 10 inch skillet. Cut the beef's cooking time by roughly 20% because of the smaller volume. Use 1.5 cups of cooked rice and 0.75 cups of cheese.
Scaling Up (Double Portion) Avoid doubling the recipe in a single pan unless you own a huge 16 inch skillet; working in batches is recommended. If you use a giant pot, only increase salt and spices to 1.5x rather than 2x, as these flavors can become too intense in larger quantities.
Debunking Common Myths
There are a few things people always say about beef that aren't actually true.
One big one is that searing meat "seals in the juices." It doesn't. Moisture loss happens regardless of how you cook it. The real reason we sear is for the flavor, the brown crust adds a savory depth that you can't get any other way.
Another myth is that you need to brown the beef completely before adding onions. Actually, adding them together allows the onions to cook in the beef fat, which makes them sweeter and more flavorful.
Fun Flavor Twists
The Ground Beef Pepper Skillet is incredibly versatile. You can maintain the same foundation while tweaking the seasonings to suit your mood.
The Spicy Version Toss in a diced jalapeño along with the bell peppers and replace the smoked paprika with chipotle powder. This adds a smoky kick that complements the cheddar perfectly.
The Lighter Version Substitute the beef with ground turkey or lean chicken. To maintain a bold taste, stir in a tablespoon of Worcestershire sauce at the same time you add the tomatoes, replacing the richness of the beef.
The Zesty Version Once you take the pan off the heat, mix in some fresh chopped cilantro and a squeeze of lime. This adds a bright contrast to the savory tomato sauce.
Serving the Dish
This is a complete meal in one pan, but a few additions can make it feel like a feast.
The Fresh Pairing Serve this alongside a crisp green salad with a lemon vinaigrette. The acidity of the salad cuts through the richness of the beef and cheese, making the whole meal feel lighter.
The Family Feast If you're serving a crowd, put the skillet in the center of the table and serve it with a side of crusty sourdough bread. The bread is great for soaking up any remaining tomato sauce on the plate.
For a different twist, you can serve this over a bed of fresh spinach. The heat from the skillet wilts the spinach slightly, adding an extra layer of nutrients and color to the plate.
High in Sodium
910 mg 910 mg of sodium per serving (40% 40% of daily value)
The American Heart Association recommends limiting sodium intake to no more than 2,300 mg per day, with an ideal limit of 1,500 mg for most adults to reduce the risk of cardiovascular disease.
Tips to Reduce Sodium
-
Omit Added Salt-25%
Completely remove the 'salt to taste' from the recipe. The other ingredients provide enough savory notes to carry the dish.
-
Switch to No-Salt-Added Canned Goods-20%
Replace the standard diced tomatoes and tomato sauce with no-salt-added versions to drastically reduce processed sodium.
-
Moderate the Cheese-15%
Reduce the shredded cheddar cheese by half or substitute it with a lower-sodium alternative like fresh mozzarella.
-
Enhance with Aromatics
Increase the amount of dried oregano and smoked paprika, or add fresh lemon juice for a bright flavor without the salt.
Recipe FAQs
How do I keep the peppers from getting mushy?
Sauté them for only 4–6 minutes. Add them to the skillet after the beef is browned so they maintain a crisp snap.
Can I use a different pepper color?
Yes, any bell pepper variety works. Red, orange, or yellow peppers add a sweeter flavor profile than traditional green ones.
Are there plant-based alternatives for this dish?
Yes, substitute the beef with crumbled tofu or lentils. For a dedicated plant-based meal, see these vegan options.
Is it true that this must be baked to taste like traditional stuffed peppers?
Not true. The high-heat sear in a skillet develops the same savory depth in a fraction of the time.
What other meals use these ingredients?
Try making traditional stuffed peppers. You can use the same beef, rice, and cheese to fill whole peppers and bake them in the oven.
Ground Beef Pepper Skillet in 30 Minutes