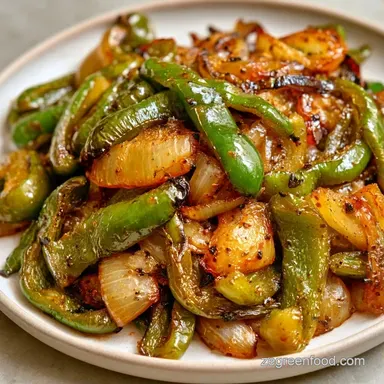
Sautéed Green Peppers with Yellow Onion
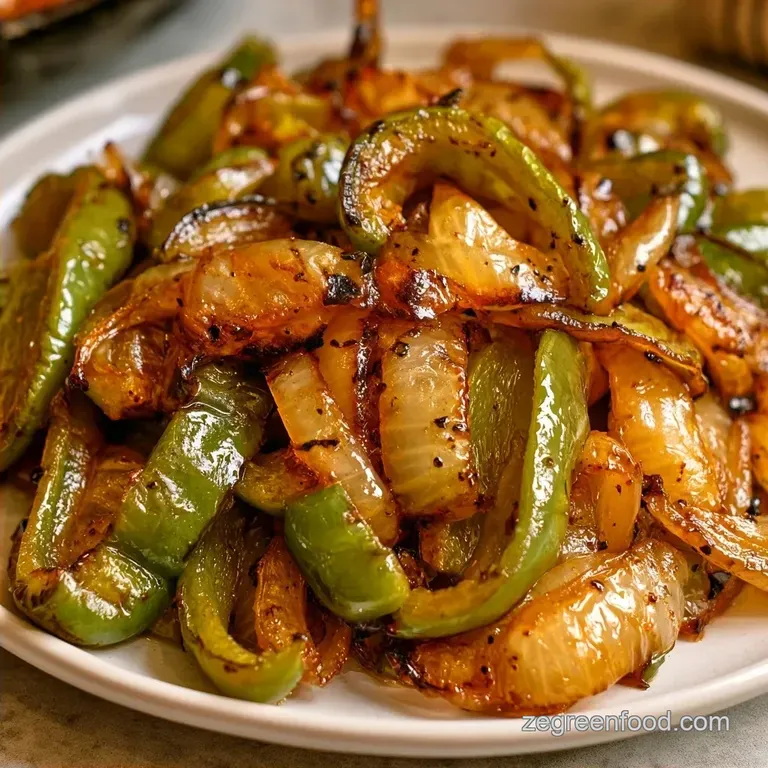
- Time: 10 min prep + 15 min cook
- Flavor/Texture Hook: Charred, savory, and tender crisp
- Perfect for: Weeknight sides or sandwich toppings
Quick Sautéed Green Peppers Recipe
The sound of peppers hitting a hot skillet is one of my favorite kitchen noises. It's that aggressive hiss that tells you the pan is actually hot enough to sear, not just warm enough to steam.
I used to just throw everything in at once, but that always left me with a pot of soggy, pale vegetables that tasted more like boiled peppers than a proper sauté.
The trick is all in the patience. You want those mahogany colored edges that only happen when the vegetables have a moment to actually touch the metal. Once you get that char, the bitterness of the green pepper turns into something savory and deep.
Sautéed Green Peppers are a total lifesaver when you need a side dish that feels like a real effort but only takes a few minutes. It's a simple process, but when you get the timing right, it transforms a basic meal into something that feels like it came from a bistro.
The Basics and Specs
This dish is all about the contrast between the sweet, translucent onions and the slightly bitter, charred peppers. Since we're keeping the oil minimal and the heat high, it stays light. It’s a great way to get a lot of nutrients on the plate without adding heavy creams or sugars.
I've found that using a cast iron skillet makes a huge difference here. The heat retention is much better than a thin non stick pan, which means the temperature doesn't drop when you dump in a pound of cold peppers.
For those who like to plan, this is an excellent option for meal prep. It holds its texture surprisingly well in the fridge, though the "crisp" part of tender crisp softens a bit after a day.
| Method | Time | Texture | Best For |
|---|---|---|---|
| Sauté | 15 min | Charred/Tender | Quick side |
| Roast | 30 min | Soft/Sweet | Meal prep |
| Steam | 10 min | Soft/Bland | Low cal focus |
Why the Method Works
The order of operations is what saves this dish from becoming a mushy mess. Onions and peppers have different water contents and sugar levels, so they need different treatment.
High Initial Heat: Searing the vegetables quickly prevents them from releasing too much water. If the pan is too cool, the peppers boil in their own juices, which ruins the texture.
Staggered Entry: Onions take longer to soften and caramelize. Giving them a head start ensures they are golden by the time the peppers are finished.
Late Garlic Addition: Garlic burns in about 60 seconds at high heat. Adding it at the very end keeps the flavor pungent and sweet rather than bitter and burnt.
The Grocery List
I always recommend buying the heaviest peppers you can find. The denser the walls of the pepper, the better they hold up to high heat. For the onion, a yellow one provides the most balanced savory base, though red works if you want a bit more color.
| Component | Purpose | Substitute Notes |
|---|---|---|
| Green Peppers | Main base | Red peppers for more sweetness |
| Yellow Onion | Savory depth | White onion for a sharper bite |
| Garlic | Pungent aroma | Garlic powder, but less fresh |
Ingredients:
- 4 large green bell peppers, sliced into 1/4 inch stripsWhy this? Uniform thickness ensures even cooking
- 1 medium yellow onion, thinly slicedWhy this? Thin half moons caramelize faster
- 3 cloves garlic, mincedWhy this? Fresh garlic adds the best aroma
- 2 tbsp olive oilWhy this? Stable at medium high temperatures
- 1/2 tsp sea saltWhy this? Draws out moisture for better searing
- 1/4 tsp cracked black pepperWhy this? Adds a subtle woody heat
- 1/4 tsp dried thyme or oreganoWhy this? Earthy notes balance the bitterness
| Original Ingredient | Substitute | Why It Works |
|---|---|---|
| Olive Oil (2 tbsp) | Butter (2 tbsp) | Richer flavor. Note: Burns faster, so lower heat slightly |
| Green Pepper (1.5 lbs) | Red Pepper (1.5 lbs) | Similar texture. Note: Much sweeter, loses the signature "green" bite |
| Sea Salt (1/2 tsp) | Kosher Salt (3/4 tsp) | Different grain size. Note: Adjust for saltiness |
Essential Kitchen Tools
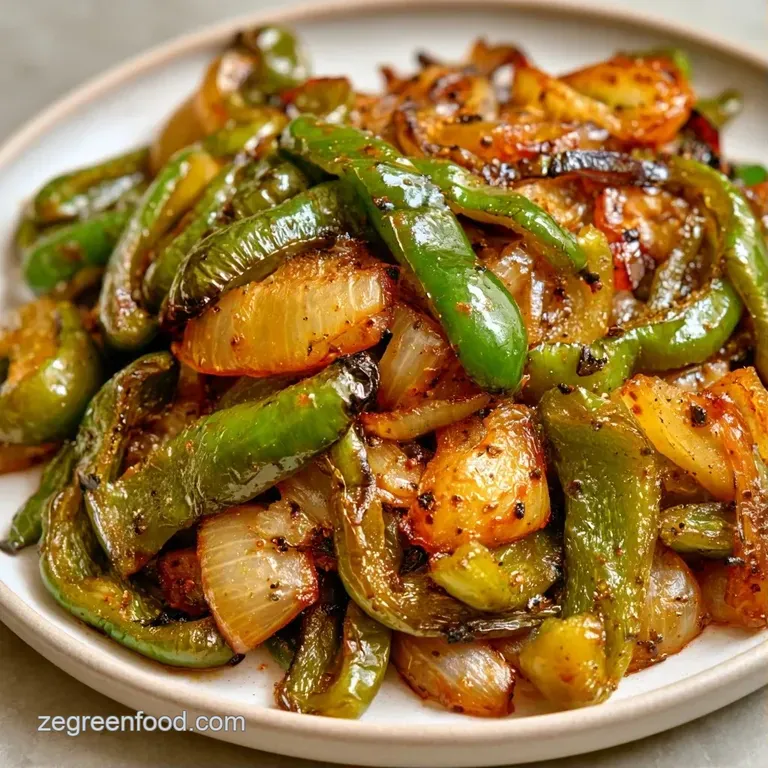
While you don't need professional equipment, your choice of pan is critical. I prefer a 12 inch cast iron skillet for its superior searing ability. A heavy stainless steel pan is a great alternative if you lack one. Just make sure the pan isn't too small, otherwise the vegetables will crowd and steam instead of brown.
Make sure your chef's knife is sharp. Using a dull blade often crushes the bell peppers, causing them to release moisture prematurely and ruining the potential for a good char.
To stir the vegetables without snapping the strips, use tongs or a flexible spatula. The goal is to keep them moving without mashing the produce.
Cooking the Peppers
It's time to start cooking. Have all your ingredients prepped and chopped before starting, as this process moves quickly.
- Thoroughly wash the bell peppers. Remove the seeds and white membranes, then slice them into even 1/4 inch strips. Cut the onion into thin half moons.
- Heat olive oil in a 12 inch cast iron skillet over medium high heat.
- When the oil begins to shimmer, stir in the sliced onions. Sauté for 3–5 minutes until they are translucent and golden.
- Slightly increase the heat and add the green peppers. Spread them across the skillet and leave them undisturbed for 2 minutes until you see light charred spots.
- Stir and cook for an additional 5–7 minutes until the Sautéed Green Peppers are vibrant and tender crisp.
- Fold in the minced garlic, salt, pepper, and herbs.
- Cook for 60 seconds more until the garlic smells fragrant.
- Immediately remove from the heat to ensure the garlic doesn't brown.
Pro Tip: With a very hot skillet, garlic can burn in an instant. I often slide the pan off the heat entirely before stirring in the garlic and herbs, relying on the residual heat.
Fixing Common Issues
Even with a simple Sautéed Green Peppers recipe, things can go sideways. Most issues come down to temperature and pan space.
Fixing Soggy Peppers
This happens when the pan is too crowded. When you pack too many peppers into a small space, they release steam that has nowhere to go. Instead of searing, they boil in their own liquid. If you're doubling the batch, cook the vegetables in two separate turns to keep the heat high.
Preventing Bitter Garlic
Garlic has a low burn point. If it turns dark brown or black, it becomes acrid and ruins the whole pan. Always add it in the final minute of cooking. If you're worried about the heat, stir the garlic into the vegetables after you've turned off the flame.
Avoiding Burnt Onions
If your onions are turning black instead of golden, your heat is too high or you aren't stirring enough. Keep them moving every minute or so. If they look like they're browning too fast, add a tiny splash of water to the pan to bring the temperature down.
Customizing the Flavor
One of the things I love about Sautéed Green Peppers is how they fit into so many different meals. You can easily tweak the ingredients to fit what's in your pantry.
For a more hearty side, I like making Sautéed Green Peppers and Mushrooms. Just add 8 oz of sliced cremini mushrooms at the same time as the peppers. The mushrooms soak up the olive oil and garlic, adding a rich, earthy depth.
If you're planning a sandwich night, these are the perfect Sautéed Green Peppers for Philly Cheesesteak. Just add a bit more onion and a splash of Worcestershire sauce at the end to give them that savory, steakhouse profile.
They also work brilliantly as Sautéed Green Peppers for Italian Beef, adding a bright contrast to the rich, slow cooked meat.
For those looking for something different, you could try these Italian Green Peppers side variations. , if you prefer your peppers as a main event, you might enjoy Healthy Stuffed Green Peppers with rice and lean protein.
For a a more colorful plate, use a mix of red, yellow, and green peppers. The red ones are sweeter and softer, while the green ones provide the structure and slightly bitter edge.
Decision Shortcut:
- For a sweeter taste: Add a pinch of brown sugar with the onions.
- For more char: Use a cast iron pan on the highest heat setting.
- For softer peppers: Sauté for an extra 3 minutes before adding garlic.
Storage and Leftovers
Sautéed Green Peppers have an impressive shelf life. Once cooled, transfer them to an airtight glass container; they will stay fresh in the refrigerator for 3 to 4 days.
I generally advise against freezing these since the texture is affected. Because the cell walls break down during the freeze-thaw process, the bell peppers often become mushy. You are better off preparing a fresh batch or sticking to cold storage.
When reheating, try to avoid the microwave, as it often leaves them soft and steamed. Instead, toss them into a hot skillet for 2 minutes. This helps restore the original sear and brings back the scent of the garlic.
To minimize waste, don't throw away the seeds and stems. I collect mine in a freezer bag alongside miscellaneous vegetable peelings. Once that bag is brimming, I simmer the contents in water to produce a simple vegetable stock for my soups.
Best Ways to Serve
These Sautéed Green Peppers are incredibly versatile. Because they're low calorie but high flavor, they work as a healthy side or a flavor packed topping.
As a fresh side, serve them alongside a grilled steak or a piece of baked salmon. The bitterness of the green pepper cuts through the richness of the fat in the meat. If you're doing a plant based meal, toss these with some chickpeas and a squeeze of lemon for a quick, nutrient dense bowl.
They are also a fantastic addition to breakfast. Stir a handful of Sautéed Green Peppers into your morning scrambled eggs or an omelet. The savory, charred flavor makes a simple egg dish feel much more substantial.
For a quick lunch, pile them onto a toasted ciabatta roll with some melted provolone cheese. This gives you a light version of a cheesesteak without the heavy meat.
Finally, if you're serving a crowd, put the Sautéed Green Peppers in a bowl and let people use them as a topping for tacos or burger sliders. It's an easy way to add color and a fresh, garden grown taste to the table.
Recipe FAQs
Is it true that other fats are better than olive oil for sautéing peppers?
Actually, no. Olive oil allows for the higher heat needed to get a light char without burning.
Which seasonings pair best with these peppers?
Use sea salt, cracked black pepper, and dried thyme or oregano. These simple herbs enhance the natural sweetness of the vegetables.
Do green peppers need more cooking time than onions?
Yes, they generally do. Onions sauté for 3–5 minutes, while the peppers require about 7–9 minutes to reach a tender-crisp state.
How much total stove time do these peppers need?
Allow 15 minutes of active cooking time. This includes browning the onions and sautéing the peppers until vibrant.
Where can I use these peppers in other fast meals?
Toss them into a quick chicken stir fry for an easy dinner. This is a great way to use up extra prepped strips.
How to keep peppers tender-crisp instead of mushy?
Cook them for only 5–7 minutes after the initial char. Remove them from the heat immediately once they are vibrant and just softened.
Are frozen peppers just as good as fresh for sautéing?
No, and here's why. Frozen peppers release excess moisture that prevents the light charring essential for this recipe's flavor.
Sautéed Green Peppers in 25 Minutes