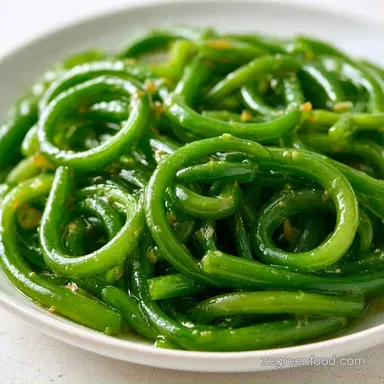
Snappy Refrigerator Pickled Garlic Scapes
- Time: 20 min active + 24 hours chilling
- Flavor/Texture Hook: Tangy, snappy, and pungent
- Perfect for: Budget-friendly appetizers or burger toppers
That first snap of a cold, vinegary scape is the best part of early summer. I remember the first time I saw these at a farmers market. They looked like weird, curly green noodles, and they were dirt cheap because the growers had too many. I bought three bunches and spent the afternoon prepping them in my tiny kitchen.
The result was a bright, punchy snack that didn't cost me more than a few bucks. If you have a garden or a local farm nearby, you've got to try this. It's a quick win that makes you feel like a pro without the fancy gear.
You can expect a sharp, garlicky flavor that mellows out as they sit. These Pickled Garlic Scapes are essentially the "cool" cousin of the garlic clove, offering a crunch that works in almost any dish.
Easy Pickled Garlic Scapes Recipe
How the Brine Works
- Boiling Water: Hot liquid penetrates the plant cells faster, which helps the flavor soak in quickly.
- Vinegar Ratio: A 1:1 ratio of water to vinegar keeps the acidity high enough to preserve the scapes without tasting like pure acid. This is similar to how a Garlic Scape Pesto uses raw pungency but balances it with fat.
- Salt Choice: Using pickling salt instead of table salt prevents the brine from turning cloudy.
Method Comparison
| Method | Time | Texture | Best For |
|---|---|---|---|
| Stovetop Boil | 20 min active | Snappy | Quick turnaround |
| Cold Steep | 2 days active | Softer | Delicate flavors |
Everything You'll Need
What Each Ingredient Does
| Ingredient | What It Does | Best Swap |
|---|---|---|
| White Vinegar | Provides the acid for pickling | Apple Cider Vinegar (sweeter) |
| Pickling Salt | Keeps scapes crisp and brine clear | Kosher Salt (check for additives) |
| Garlic Scapes | The main star with garlic flavor | Green beans (milder) |
| Sugar | Balances the sharp vinegar bite | Maple syrup (adds earthiness) |
Ingredients
- 1 lb fresh garlic scapes, trimmed and cut into 3 inch pieces Why this? Provides the core pungent flavor and snap
- 1 tbsp pickling salt (for washing) Why this? Draws out excess moisture
- 1 cup distilled white vinegar Why this? Strong acid for a clean, sharp taste
- 1 cup filtered water Why this? Dilutes acid to prevent burning the palate
- 1 tbsp granulated sugar Why this? Rounds out the harsh edges of the vinegar
- 1 tsp pickling salt (for brine) Why this? Enhances flavor and helps preservation
- 1 tsp black peppercorns Why this? Adds a woody, spicy depth
- 1 tsp mustard seeds Why this? Adds a slight nutty pop
- 1/2 tsp red chili flakes Why this? Adds a subtle back end heat
Quick Recipe Specs
Right then, here is the breakdown of the timing. Trust me, don't skip the chill time, or you'll miss the best part of the flavor profile.
- Prep Time: 20 minutes
- Cook Time: 5 minutes
- Total Time: 24 hours 25 minutes
- Yield: 16 servings (two pint jars)
Necessary Kitchen Gear
You don't need a fancy lab for this. A few basic tools will do the trick.
- Two pint sized glass jars with lids
- A small saucepan for the brine
- A sharp knife and cutting board
- A butter knife or chopstick (for removing bubbles)
- A kitchen towel for drying the scapes
Steps for Pickling
Let's crack on with the process. The key is to pack the jars tightly so the scapes don't float.
- Thoroughly wash the garlic scapes in cold water and pat them dry with a towel. Note: Wet scapes can dilute the brine
- Cut the scapes into 3 inch lengths, leaving curly tops whole or in smaller bits.
- Divide the scapes between two pint jars, packing them tightly and twirling curly sections against the glass.
- In a small saucepan, combine vinegar, water, sugar, salt, peppercorns, mustard seeds, and chili flakes.
- Place the pan over medium high heat and bring to a rolling boil, stirring until sugar and salt are completely dissolved. Wait for the brine to bubble vigorously.
- Carefully pour the boiling brine over the scapes in each jar, leaving 1/2 inch of headspace.
- Use a butter knife or chopstick to gently release trapped air bubbles from the jars.
- Wipe the rims clean, screw on lids fingertip tight, and let jars cool to room temperature.
- Transfer to the refrigerator and allow to infuse for 24 hours for peak flavor.
Solving Common Issues
If your Pickled Garlic Scapes aren't looking right, it's usually a simple fix. Most issues come down to how the jars were packed or the type of salt used.
Troubleshooting Common Issues
| Issue | Solution |
|---|---|
| Why Your Scapes Float | When scapes float, they aren't fully submerged in the acid. This can lead to softer textures at the top. I used to just push them down with my finger, but a chopstick works better. |
| Why the Brine Looks Cloudy | Cloudiness usually happens if you use table salt with anti caking agents. According to [Serious Eats](https://www.seriouseats. |
| Why They Lost Their Crunch | If they're too soft, you might have left them in the hot brine for too long before refrigerating. Get them to room temp, then get them in the fridge fast. Quick Fix Table |
Scaling the Batch
Scaling Down (½ Batch) Use 1/2 lb of scapes and one pint jar. Reduce the brine ingredients by half. Since there's less liquid, the brine will boil in about 2 minutes instead of 5.
Scaling Up (2x-4x Batch) When doubling, don't double the salt and chili flakes fully. Use about 1.5x the spices to avoid overwhelming the garlic. Work in batches if your saucepan is small to ensure the brine reaches a full boil quickly.
For very large batches, leave the lids slightly loose for the first hour of cooling to let excess pressure escape.
Common Myths
Myth: You must can these for them to last. Truth: While canning makes them shelf stable, refrigerator pickling is faster and keeps the scapes crunchier. They stay good for weeks in the fridge anyway.
Myth: All vinegar works the same. Truth: White vinegar is the most neutral. Apple cider vinegar adds a fruity note, and rice vinegar is much sweeter. Your choice changes the final vibe of the dish.
Storage and Waste Tips
Keep your jars in the main part of the fridge, not the door, where the temperature swings. These will stay fresh and snappy for about 3-4 weeks.
Don't toss the brine once you've eaten the scapes. It's basically a seasoned garlic vinegar. I use it as a base for salad dressings or to splash into a pan when sautéing greens. If you have leftover scape ends that were too small for the jars, toss them into a freezer bag for your next batch of soup.
Best Ways to Serve
These are incredibly versatile. I love tossing a handful on a charcuterie board next to some sharp cheddar and salty salami. The acidity cuts through the fat of the cheese.
They also make a great topping for burgers or hot dogs. If you want something more substantial, try them alongside Chili Oil Sinangag for a pungent, savory breakfast that wakes you up.
Chef's Note: Try chopping a few Pickled Garlic Scapes and mixing them into a tuna or chicken salad. The vinegary pop replaces the need for extra lemon juice.
Adding Your Own Twist
Once you've got the basic method down, you can play with the flavors. If you want more heat, double the red chili flakes or add a sliced jalapeño to each jar.
For a "Sweet Pickle" style, increase the sugar to 2 tablespoons. It won't be like a bread and butter pickle, but it takes the edge off the garlic.
If you have fresh dill or peppercorns in the pantry, throw them in. An herbal twist with a sprig of fresh dill makes these taste more like a traditional deli pickle. You can even add a strip of lemon peel for a citrusy brightness that works great with seafood dishes.
Recipe FAQs
What's the best way to use garlic scapes?
Pickle or sauté them. They provide a mild garlic punch that works perfectly as a topping for plant based tacos.
Can you use garlic scapes instead of green onions?
Yes, but the flavor is more intense. Scapes have a stronger garlic profile than the mild onion taste of scallions, so use them more sparingly.
How to cut garlic scapes?
Cut the scapes into 3 inch lengths. Leave the curly tops whole or in smaller bits to create a more attractive presentation in the jars.
Do you cut the green part out of garlic before you use it?
No, the green part is the edible portion of the scape. You only need to trim any woody ends from the base before pickling.
How do you harvest and store garlic?
Dig up bulbs once the lower leaves turn brown. Cure them in a shaded, airy area for several weeks before moving them to a cool, dry storage spot.
Can we eat garlic leaves?
Yes, they are completely edible. Garlic leaves and scapes offer a similar, pungent flavor that adds depth to savory dishes.
Why does my pickling brine look cloudy?
Avoid using table salt with anti caking agents. Use pickling salt to ensure your brine remains crystal clear.
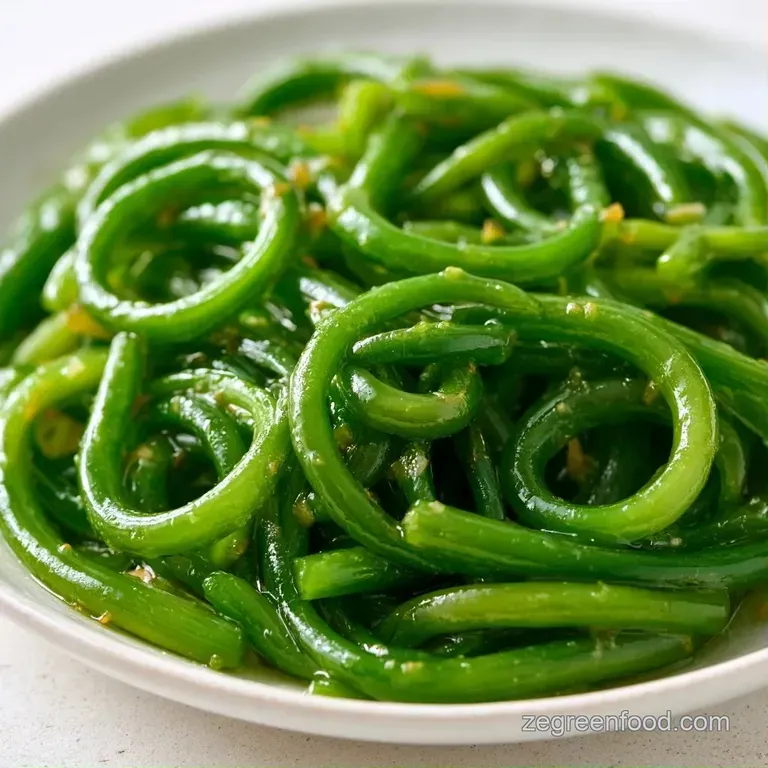
Pickled Garlic Scapes