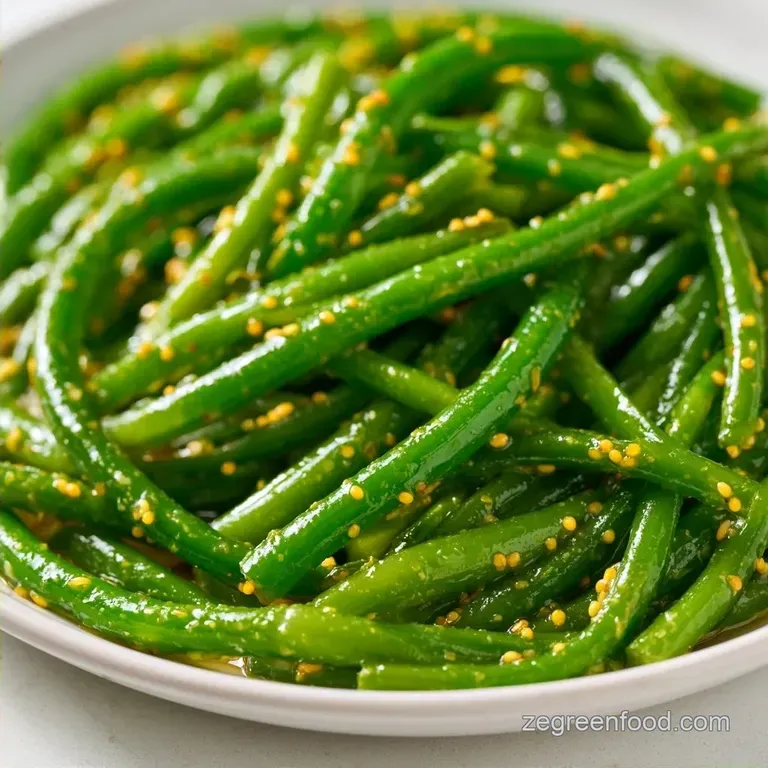
Quick Pickled Garlic Scapes with White Vinegar
- Time: 10 min active + 24 hours chilling
- Flavor/Texture Hook: Tangy, crisp, and punchy
- Perfect for: budget-friendly meal prep, charcuterie boards, or burger toppings
Ever wonder why garlic plants grow those weird, curly green stems in the spring? Most people ignore them, but they're actually a mild, fresh version of garlic that doesn't leave you with "garlic breath" for three days.
I remember buying a massive bunch at a farmers market because they looked cool, only to realize I had no idea how to use them before they turned limp.
That's how I stumbled into making Quick Pickled Garlic Scapes. It's a fast way to turn a cheap bundle of greens into a condiment that lasts for weeks. You get this bright, colorful pop on your plate and a snap that beats any store-bought pickle.
You can expect a tangy treat that's half garlic, half green bean in vibe. This recipe doesn't require any fancy canning gear, just a pot and a few jars. It's the most budget friendly way to handle a seasonal glut of garden produce.
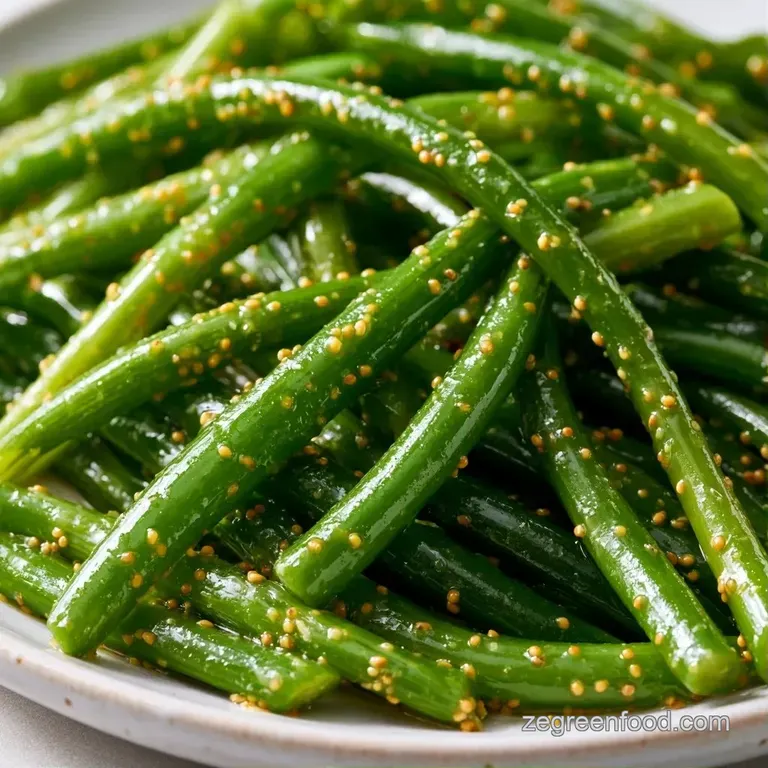
Easy Quick Pickled Garlic Scapes Recipe
Why These Pickles Work
- Boiling Brine: Pouring the liquid while it's bubbling forces air out of the stems. This prevents floating and ensures every inch gets coated.
- Vinegar Ratio: Using a 1:1 ratio of water to white vinegar keeps the snap without making the taste too aggressive.
According to Serious Eats, using pickling salt instead of table salt prevents the brine from turning cloudy, keeping your jars looking clean and colorful.
| Method | Time | Texture | Best For |
|---|---|---|---|
| Fast (Fridge) | 24 hours | Extra Crisp | Immediate use, small batches |
| Classic (Canned) | 1-2 weeks | Softer | Long term pantry storage |
What Each Ingredient Does
| Ingredient | What It Does | Best Swap |
|---|---|---|
| White Vinegar | Provides acidity and preserves | Apple Cider Vinegar (milder) |
| Cane Sugar | Balances the sharp vinegar bite | Honey (adds floral notes) |
| Pickling Salt | Draws out moisture without clouding | Kosher salt (check for additives) |
| Fresh Dill | Adds an earthy, herby aroma | Fresh parsley or peppercorns |
Necessary Ingredients
- 1 lb fresh garlic scapes, trimmed and cut into 2 inch pieces Why this? Uniform sizes ensure they pickle evenly.
- 1 tsp pickling salt Why this? Prevents cloudy brine.
- 1 cup white vinegar Why this? Strong acidity for a clean tang.
- 1 cup filtered water Why this? Avoids chlorine tastes.
- 1 tbsp cane sugar Why this? Cuts the acid sting.
- 1 tbsp mustard seeds Why this? Adds a subtle spicy depth.
- 1 tsp black peppercorns Why this? Classic savory heat.
- 1/2 tsp red pepper flakes Why this? Gives a colorful, mild kick.
- 2 sprigs fresh dill Why this? Brightens the heavy garlic flavor.
Required Kitchen Tools
You don't need a professional kitchen for this. A medium saucepan to boil the brine and two sterilized pint jars are the main requirements. Use a slotted spoon or a clean fork to press the scapes down, and a sharp knife or kitchen shears for the trimming.
If you're on a budget, any glass jar with a tight lid works, though Mason jars are the standard.
Step by step Guide
- Trim the woody ends and curly tips of the garlic scapes. Cut the stems into uniform 2 inch lengths.
- Pack the scapes tightly into sterilized jars, alternating with fresh dill sprigs. Note: Pack them tight so they don't float.
- Combine white vinegar, water, cane sugar, mustard seeds, peppercorns, and red pepper flakes in a saucepan.
- Bring the mixture to a rolling boil over medium high heat, stirring until sugar and salt are dissolved.
- Carefully pour the boiling brine over the packed scapes, leaving 1/2 inch of headspace.
- Use a clean utensil to press the scapes down to remove air bubbles.
- Seal jars tightly.
- Let sit at room temperature for 30 minutes until the jars feel warm but not hot.
- Transfer to the refrigerator to cure for at least 24 hours.
Fixing Pickle Problems
If your pickles come out a bit off, it's usually a matter of temperature or packing. Most issues are easy to solve with a few tweaks.
Troubleshooting Common Issues
| Issue | Solution |
|---|---|
| Why Your Pickles Are Soft | This usually happens if you let the jars sit at room temperature for too long before refrigerating. |
| Why Your Brine Is Cloudy | Cloudiness often comes from using table salt containing anti caking agents. It doesn't affect the taste, but it looks less professional. |
| Why The Scapes Float | If you didn't pack the jars tightly enough or forgot to press down the air bubbles, the scapes will float. This leaves the tops exposed to air, which can lead to spoilage. |
Flavor Variation Ideas
If you want to change the profile, you can easily swap the spices. For a Korean style twist, add a pinch of gochugaru (Korean red pepper flakes) and a slice of fresh ginger. This makes the Quick Pickled Garlic Scapes taste more like a traditional banchan side dish.
For those who prefer something less acidic, you can try a Pickled Garlic Scapes No Sugar version by replacing the sugar with a teaspoon of maple syrup or leaving it out entirely for a sharp, savory bite. If you have leftover scapes that you didn't pickle, they are brilliant when blended into a Garlic Scape Pesto for a quick pasta sauce.
Decision Shortcut: If you want more heat, double the red pepper flakes. If you want a milder tang, use apple cider vinegar. If you want more herbal notes, add a bay leaf to each jar.
Adjusting the Batch Size
Scaling this recipe is straightforward since it's a brine based method.
Scaling Down (½ batch): Use 1/2 lb of scapes and one pint jar. Reduce all liquids and spices by half. Since the volume is smaller, the brine will boil faster, so watch it closely to avoid over reduction.
Scaling Up (2x-4x batch): When doubling or tripling, don't just multiply the spices linearly. Increase the salt and peppercorns to 1.5x first, then taste the brine. If it's too weak, add the rest. Work in batches when filling jars to ensure the brine stays boiling hot when it hits the vegetables.
Debunking Pickle Myths
Some people think you need a pressure canner for every kind of pickle. That's not true for refrigerator pickles. Since these stay chilled, the cold temperature and acidity do the work of preservation.
Another myth is that boiling brine ruins the nutrients. While some vitamins drop during heating, the process of pickling actually makes the garlic scapes easier to digest and preserves the flavor for weeks, which is a fair trade off.
Storage and Waste
Keep these jars in the back of the fridge where the temperature is most stable. They'll stay crisp and punchy for about 3 to 4 weeks. Avoid using a dirty fork to fish them out, as introducing bacteria will shorten their shelf life.
To avoid waste, don't throw away the leftover brine. It's a cheap, flavorful liquid that works as a marinade for grilled chicken or a splash of acidity in a homemade vinaigrette. If you have the woody ends of the scapes that you trimmed off, toss them into a freezer bag.
When the bag is full, simmer them with some onion scraps and water to make a light, garlicky vegetable broth.
Best Pairing Ideas
These are versatile enough to go on almost anything savory. They cut through the richness of fatty meats or add a bright note to a bland sandwich. I love piling them onto a burger with a slice of sharp cheddar.
They also work as a colorful garnish for a bowl of Chili Oil Sinangag, where the vinegary snap balances the toasted garlic rice. For a budget friendly appetizer, serve them alongside some cubes of feta cheese and warm pita bread. The contrast of the salty cheese and the tangy scapes is a winner every time.
Recipe FAQs
How to cut garlic scapes?
Trim the woody ends and curly tips. Cut the remaining stems into uniform 2 inch lengths to ensure they pack tightly into the jars.
How long does it take to pickle garlic scapes?
Wait at least 24 hours. After sitting at room temperature for 30 minutes, the jars must cure in the refrigerator for a full day before eating.
Can you use garlic scapes instead of green onions?
Yes, they work as a pungent substitute. Their bold flavor complements hearty dishes, similar to how we balance bold textures in our roasted veggie bowl.
How to make pickled garlic fast?
Pour boiling brine over packed scapes. This method allows the scapes to cure in the refrigerator within 24 hours rather than requiring weeks of fermentation.
Is it true that you should leave the woody ends on the scapes?
No, this is a common misconception. You must trim the woody ends and curly tips to avoid a tough, unpleasant texture.
How to avoid botulism when pickling garlic?
Use white vinegar and store the jars in the refrigerator. The acidity of the vinegar combined with constant cold storage prevents the growth of harmful bacteria.
Why are my pickled garlic scapes soft?
You likely left the jars at room temperature too long. Transfer them to the refrigerator after exactly 30 minutes to maintain a crisp snap.
Quick Pickled Garlic Scapes

