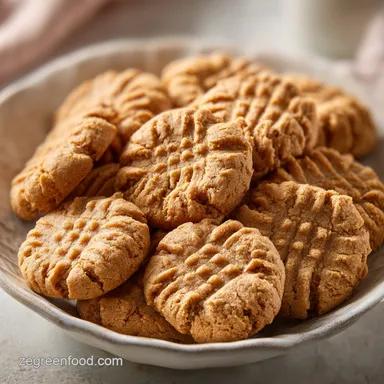
Vegan Peanut Butter Cookies: Chewy and Golden

- Time: 10 min active + 12 min baking = Total 22 minutes
- Flavor/Texture Hook: Salty sweet, velvety nuttiness with a slight chew
- Perfect for: Quick cravings, kid friendly snacks, or plant based dessert platters
That smell of roasting peanuts hitting the oven heat is honestly one of my favorite things in the world. It fills the whole house, making everything feel cozy and warm. I remember the first time I tried making a plant based version of these for my brother, who is a total peanut butter fanatic.
I was terrified they'd come out like dry hockey pucks or, even worse, just melt into one giant pancake on the tray.
But these turned out with this incredible, velvety center and just enough of a golden ring around the edge. When I served them, he didn't even realize they were vegan until I told him. That's the goal, right? You want that classic, comforting taste that makes people forget you've swapped out the dairy and eggs.
We're going for a result that feels indulgent but stays simple. You can expect a treat that's salty, sweet, and has a texture that almost melts in your mouth. These Vegan Peanut Butter Cookies are a win because they don't require any weird egg replacements like flax seeds or applesauce, which sometimes leave a strange aftertaste.
Vegan Peanut Butter Cookies: Texture Secret
Getting the right "bite" in a cookie without eggs is usually where things go wrong. Most people just throw in a binder and hope for the best, but the real trick is managing the fats and sugars. We're using a combination of creamy peanut butter and a mix of maple syrup and brown sugar.
This creates a dense, fudgy interior while the baking soda gives it just enough lift to not feel like a brick.
I've found that if you use only one type of sweetener, the cookie either becomes too crisp or too soft. The brown sugar brings that deep, molasses like chew, while the maple syrup adds a touch of moisture and a different kind of sweetness. It's a balance that mimics the richness of butter and eggs perfectly.
Since we aren't using butter, the peanut butter does all the heavy lifting. It provides the fat needed for a tender crumb. If you use a natural peanut butter that's too oily, your cookies might spread more, but as long as you stir it well, the flour will hold everything together.
The Texture Trick
The Sugar Duo: Brown sugar creates a chewy, dense structure while maple syrup adds moisture and a subtle caramel note.
The Lift: Baking soda reacts with the slight acidity in the brown sugar to create tiny air bubbles, keeping the cookies from becoming too heavy.
Fat Stability: Peanut butter acts as the primary emulsifier, holding the fats and liquids together so the cookies don't separate in the oven.
Moisture Control: The ratio of flour to fat is tight here, ensuring the cookies set quickly without losing that velvety middle.
The way these cookies bake is all about the temperature. If the oven is too hot, the edges burn before the middle sets. If it's too low, they spread too much. Keeping it at exactly 350°F (175°C) ensures the edges get that golden color while the centers stay soft.
| Method | Time | Texture | Best For |
|---|---|---|---|
| Oven Bake | 12 minutes | Golden edges, soft center | Classic batches |
| Stovetop Pan | 15 minutes | Fudgy, brownie like | Single servings |
| Air Fryer | 8 minutes | Crispier exterior | Ultra fast craving |
It's worth noting that the oven method is the gold standard for these. While you can technically do a pan cookie version on the stove, you lose that signature fork crisscross look and the specific edge to center contrast.
Shopping List Details
When you're picking up your gear, the type of peanut butter matters more than you'd think. I prefer a creamy, no stir variety for consistency, but natural works too if you're patient with the stirring. For the flour, all purpose is the way to go for that classic structure, as explained in the flour guides over at King Arthur Baking, where they detail how protein content affects chewiness.
Don't skip the salt. Even though peanut butter is usually salted, a pinch of extra salt cuts through the sweetness of the maple syrup and makes the peanut flavor pop. It's the difference between a cookie that tastes "sweet" and one that tastes "complex."
| Ingredient | Science Role | Pro Secret |
|---|---|---|
| Peanut Butter | Fat & Structure | Use a brand with no added palm oil for a cleaner taste |
| Brown Sugar | Chew & Color | Pack it tightly in the measuring cup for more moisture |
| Maple Syrup | Liquid Binder | Real grade A maple syrup adds a depth agave can't match |
| Baking Soda | Leavening | Sift it to avoid those bitter little clumps in the dough |
The chocolate chips add a necessary bitterness to balance the richness. I recommend semi sweet or dark chocolate to keep the flavor profile from becoming overly cloying.
For the Dough
- 125g creamy peanut butter Why this? Provides the fat and primary flavor base
- 65g maple syrup Why this? Adds moisture and a liquid binder
- 65g packed brown sugar Why this? Essential for the chewy texture
- 5ml vanilla extract Why this? Rounds out the nutty notes
- 125g all purpose flour Why this? Creates the necessary structure
- 3g baking soda Why this? Provides a slight lift
- 1.5g salt Why this? Enhances all other flavors
Optional Add ins
- 85g vegan semi sweet chocolate chips Why this? Adds a rich, molten contrast
- 30g chopped roasted peanuts Why this? Gives a satisfying crunch
Essential Kitchen Tools
You don't need a fancy setup for this, but a few things make it way easier. A large mixing bowl is a must, and while a stand mixer such as a KitchenAid works, a simple whisk and a spatula are all you really need.
I prefer using a digital scale because measuring flour by the cup can be a nightmare - one packed cup can be 20g more than a scooped cup, which can lead to dry cookies.
For the trays, parchment paper or a silicone mat is non negotiable. Without them, these cookies can stick to the pan, and trying to scrape them off with a spatula usually results in a broken cookie and a lot of frustration.
Finally,, a fork is your best friend here. The classic criss cross pattern isn't just for looks; it helps the cookie bake evenly by flattening the top, ensuring the heat reaches the center more effectively.
Putting It All Together

Right then, let's get into the actual making. This is a fast process, so have everything measured out before you start.
- Preheat your oven to 350°F (175°C) and line your tray with parchment paper. Note: Preheating ensures the cookies set immediately instead of spreading.
- In a large bowl, whisk together the peanut butter, maple syrup, brown sugar, and vanilla until smooth. Wait until the mixture looks velvety and glossy.
- Sift in the flour, baking soda, and salt. Fold together with a spatula until no streaks of white flour remain. Note: Don't overmix or the cookies will become tough.
- Fold in the chocolate chips and chopped roasted peanuts if you're using them.
- Scoop rounded tablespoons of dough and place them 2 inches apart on the baking sheet.
- Press a fork into the top of each ball in a criss cross pattern to flatten them.
- Bake for 10-12 minutes until the edges are golden but centers look slightly soft.
- Let them cool on the pan for 10 minutes before moving to a wire rack. Note: They continue to set as they cool.
Trust me on the cooling part. If you try to move them the second they come out, they might break. They need those 10 minutes to firm up.
Fixing Baking Issues
Even for experienced cooks, things can go sideways. Usually, it comes down to the temperature of the ingredients or the exact brand of peanut butter used. If your dough feels too oily, it's probably because your peanut butter had a lot of oil separation.
Troubleshooting Common Issues
| Issue | Solution |
|---|---|
| Why Your Cookies Spread | If your cookies turn into thin pancakes, it's usually because the oven wasn't hot enough or the peanut butter was too warm. When the fat melts before the flour structure sets, the cookie collapses. |
| Why Your Texture is Crumbly | Crumbly cookies usually happen when there's too much flour. If you measured by the cup and packed it down, you might have added too much. Next time, try the "spoon and level" method or use a scale. |
| Why the Bottoms Burn | This is often a result of a thin baking sheet or a tray that's too close to the bottom element. Moving your rack to the center position usually fixes this. |
Common Mistakes Checklist
- ✓ Did you preheat the oven fully?
- ✓ Did you avoid overmixing the flour?
- ✓ Did you let them cool on the pan for 10 mins?
- ✓ Did you stir your natural peanut butter thoroughly?
- ✓ Did you use a fork to flatten the tops?
Different Flavor Tweaks
Once you've mastered the base, you can really play around with this recipe. If you want a different vibe, you can swap the peanut butter for almond butter or cashew butter. Almond butter makes the cookie a bit more delicate and slightly less salty.
For those who want something heartier, you can make vegan peanut butter oatmeal cookies by replacing half of the flour with quick oats. This adds a great chew and a bit of a rustic feel. If you're looking for something even more protein packed, you might enjoy a peanut sauce inspired flavor profile by adding a pinch of ginger or sriracha to the dough for a sweet and spicy kick.
| Original Ingredient | Substitute | Why It Works |
|---|---|---|
| Peanut Butter | Almond Butter | Similar fat content. Note: Milder, nuttier flavor |
| Maple Syrup | Agave Nectar | Similar liquid consistency. Note: Slightly sweeter |
| All Purpose Flour | GF 1:1 Blend | Maintains structure. Note: May be slightly grittier |
| Brown Sugar | Coconut Sugar | Similar molasses notes. Note: Lower glycemic index |
If you're craving something without the bake time, you can always pivot to an edible dough. While this recipe is for baked goods, a chickpea cookie dough is a great way to get that same peanut butter satisfaction without the oven.
Storage and Freshness
To keep these Vegan Peanut Butter Cookies fresh, store them in an airtight container at room temperature for up to 5 days. I find that keeping a piece of parchment paper between layers prevents them from sticking together if they're still a bit soft.
If you want them to last longer, the freezer is your best bet. Flash freeze them on a tray for an hour first, then toss them into a freezer bag. They'll stay great for up to 3 months. To eat them, just pop one in the microwave for 10-15 seconds, and it'll feel like it just came out of the oven.
Regarding zero waste, don't toss that last bit of peanut butter stuck to the sides of the jar. Pour your maple syrup and vanilla directly into the jar, shake it up, and you've got a makeshift mixing bowl with zero waste and fewer dishes to wash.
Serving Suggestions
These are obviously great on their own, but I love serving them with a cold glass of almond milk or a hot cup of coffee. The bitterness of the coffee really complements the salty sweetness of the peanut butter.
For a fancy platter, try pairing them with some fresh apple slices or grapes. The acidity of the fruit cuts through the richness of the cookies, making the whole experience feel lighter. You could even smudge a little bit of raspberry jam on top of a warm cookie for a "PB&J" twist that feels like a childhood dream.
Honestly, don't even bother with low-fat alternatives here. The richness of the peanut butter is where the magic happens. Just bake them, share them with friends, and enjoy the velvety, nutty goodness.
Recipe FAQs
Is it true that all vegan peanut butter cookies only require two ingredients?
No, this is a common misconception. While simple two-ingredient versions exist, adding maple syrup, brown sugar, and flour creates a more stable structure and a deeper flavor profile.
What binds these vegan cookies since they don't use eggs?
Peanut butter and maple syrup act as the primary binders. Together, they provide the necessary fat and moisture to hold the dough together during the baking process.
Why did my cookies spread into thin pancakes?
Your oven was likely too cold or the peanut butter was too warm. This causes the fats to melt and the cookies to collapse before the flour structure has a chance to set.
Why are the bottoms of my cookies burning?
This is often the result of a thin baking sheet. Use a heavier duty pan or line your tray with parchment paper to create a heat buffer between the oven and the dough.
How to prevent the cookie texture from becoming crumbly?
Measure your flour using a scale or the 'spoon and level' method. Packing flour directly into a measuring cup often results in too much flour, which leads to a dry, crumbly texture.
How to store these for maximum freshness?
Place them in an airtight container at room temperature. They will stay fresh for up to 5 days; keep a piece of parchment paper between layers to prevent them from sticking.
What other vegan treats pair well with these cookies?
Pair these with a creamy dessert. They go perfectly with a chilled banana pudding for a balanced, indulgent treat.
Vegan Peanut Butter Cookies